Wednesday, April 30, 2008

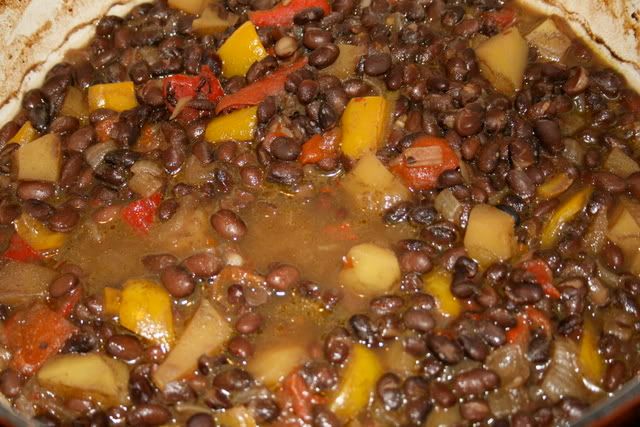
Jamaican Black Bean Pot

I bought a pound of dried black beans several weeks ago, figuring they'd be good to have on hand in the pantry. Tonight I cooked them in this sweet and tangy dish. This recipe rocks my world! It's easy, inexpensive, filling and delicious. Nice!

Photobucket

Jamaican Black Bean Pot

1 lb dried black beans
1 small onion, quartered
2 cloves garlic
1 bay leaf
1 tsp salt
2 Tbsp vegetable oil
1 large onion, chopped
1 clove garlic, minced
1 tsp mustard powder
1 Tbsp molasses
2 Tbsp dark brown sugar
1 tsp dried thyme
1/2 tsp crushed red pepper
1 red bell pepper, seeded and diced
1 yellow bell pepper, seeded and diced
2 cups butternut squash or pumpkin, seeded and diced in a 1/2-inch dice
salt and pepper
4 cups cooked white rice

Soak the beans overnight. Drain and rinse well. Place in a large saucepan, cover with fresh water, and add the onion, garlic and bay leaf. Bring to a boil, then boil rapidly for 10 minutes. Reduce heat, cover and simmer for 30 minutes. Drain, reserving the cooking liquid.

Preheat oven to 350.

Heat the oil in a large saucepan over medium-high heat. Saute the onion and garlc for about 5 minutes, until softened. Add the mustard powder, molasses, sugar, thyme and red pepper. Cook and stir for 1 minute. Add the beans and 2 cups of the cooking liquid. Spoon into an ovenproof baking dish.

Bake for 25 minutes. Remove from oven, and add the bell peppers and squash or pumpkin; mix well. Cover and bake for 45 minutes more, until the vegetables are tender.

Serve with rice.

Photobucket

Fake Egg Salad

Insertfoodhere salad sandwiches are one of my guilty pleasures. Tuna salad, chicken salad, salmon salad, egg salad...you name it. I could eat them for lunch every day and not get tired of them. None of them, however, fit into the vegetarian diet we've been trying to eat at home. We're trying not to eat dairy products, either, although we're admittedly not doing such a great job of that, but we still do try.

I had half a pack of tofu leftover from when I made Pad Thai Monday evening, and I remembered reading something about how you can make a fake egg salad using diced and/or mashed tofu, so I set out to try it! I didn't have anything really special to add to it, so I went with the bare bones basics: (vegan) mayonnaise, yellow mustard and dill pickle relish. And you know what? It really does taste like an egg salad sandwich! I didn't think it would, but it really honest to God does. Enough so that even Brad, who hates tofu, gave it an enthusiastic thumbs up, and ate an entire sandwich. Hooray!

I'm particularly excited about this because I often want an egg salad sandwich, but don't want to fuss with boiling the eggs. I'm nothing if not impatient, and all the time it takes to boil the eggs, let them cool, and wrestle with peeling them (something I really find difficult, for some reason) is oftentimes just too much for me. But now I can have egg salad that not only fits within a vegan diet, but also is super fast and easy. Yes!

Pardon the really boring, lame picture, as I didn't have anything to spruce it up with right now. There's so much more you could add to this...some green or red onions, lettuce, sprouts, tomato, or whatever your little heart desires. But definitely give it a try if you have some leftover tofu. It's really good!

Photobucket

Fake Egg Salad

1/2 brick extra-firm tofu, drained
1/2 cup mayonnaise
1 tsp yellow mustard
1 Tbsp dill pickle relish

Dice tofu into 1/4-inch pieces. Using the tines of a fork, mash about one eighth of the tofu. Add remaining ingredients, combining thoroughly. Serve on bread with desired accoutrement. ; )

Tuesday, April 29, 2008

Tuesdays with Dorie - Fluted Polenta and Ricotta Cake

Photobucket

I have to admit, I wasn't very excited about this week's TWD. The recipe was chosen by Caitlin of Engineer Baker. It didn't sound appetizing or even intriguing, so it was hard to get excited about it. I finally got down to business and made it on Monday.

I modified the recipe fairly heavily. I didn't read it very closely before going to the store, so I neglected to pick up a lemon. I had an orange in the fridge, however, so I used it instead. I don't like figs at all, so I subbed some chunks of fresh purple plums instead -- something I've been wanting to cook with for awhile. When it came time to mix up the cake, I also realized that I was short on honey, so I used a half cup of honey and about a quarter cup of blue agave nectar. The batter tasted just fabulous, and I happily licked the spatula after I popped the cake into the oven.

Photobucket

Ok. This? This is the reason I joined Tuesdays with Dorie. This cake is amazing! It's been out of the oven for 15 minutes, and I'm already on my second piece! It's so soft, moist and velvety, but with a little crunch here and there. The orange zest is incredibly fragrant. The chunks of plum are tart and fresh. The fluted edges are lightly browned and crispy. I love this cake. And I never would have made it if I hadn't joined TWD. I would have continued to scrunch my nose and flip past this page in the cookbook, and never would have known what I was missing. Hooray for Tuesdays with Dorie! And thank you, Caitlin, for such a great choice!

Photobucket

Fluted Polenta and Ricotta Cake

About 16 moist, plump dried Mission or Kadota figs, stemmed [I used 3 fresh red plums, cut in eighths)
1 c. medium-grain polenta or yellow cornmeal
½ c. all-purpose flour
1 tsp baking powder
1 c. ricotta
1/3 c. tepid water
¾ c. sugar [I reduced this to 1/2 cup]
¾ c. honey (if you’re a real honey lover, use a full-flavored honey such as chestnut, pine, or buckwheat) [I used 1/3 cup honey and a scant 1/4 cup blue agave nectar]
Grated zest of 1 lemon [I used the zest of 1 orange]
2 large eggs

Getting Ready: Center a rack in the oven and preheat the oven to 325 degrees F. Butter a 10 ½-inch fluted tart pan with a removable bottom and put it on a baking sheet lined with parchment or a silicone mat.

Check that the figs are, indeed, moist and plump. If they are the least bit hard, toss them into a small pan of boiling water and steep for a minute, then drain and pat dry. If the figs are large (bigger than a bite), snip them in half.

Whisk the polenta, flour, baking powder, and salt together.

Working with a stand mixer fitted with the whisk attachment or with a hand mixer in a large bowl, beat the ricotta and water together on low speed until very smooth. With the mixer at medium speed, add the sugar, honey, and lemon zest and beat until light. Beat in the melted butter, then add the eggs one at a time, beating until the mixture is smooth. Reduce the mixer speed to low and add the dry ingredients, mixing only until they are fully incorporated. You’ll have a sleek, smooth, pourable batter.

Pour about one third of the batter into the pan and scatter over the figs. Pour in the rest of the batter, smooth the top with a rubber spatula, if necessary, and dot the batter evenly with the chilled bits of butter.

Bake for 35 to 40 minutes, or until a thin knife inserted into the center of the cake comes out clean. The cake should be honey brown and pulling away just a little from the sides of the panm, and the butter will have left light-colored circles in the top. Transfer the cake to a rack and remove the sides of the pan after about 5 minutes. Cool to warm, or cool completely.

Photobucket

Monday, April 28, 2008

American Style Pad Thai

Photobucket

I made Pad Thai not too long ago, and I wasn't too thrilled with it. It was good, don't get me wrong, but it was (to my knowledge) a fairly authentic Thai recipe. And I'm an American, and I wanted totally inauthentic, American style Pad Thai. Pad American, if you will. ; ) So that's what I made tonight. Pad Thai with a bright pinkish reddish sauce that heavily features ketchup. That's right!

And it hit the spot. Total comfort food. Yummy!

Look at that pinkish reddish goodness!

Photobucket

American Style Pad Thai

1 lb Thai rice noodles
2 cups mung bean sprouts
6 Tbsp ketchup
6 Tbsp lime juice
2 Tbsp brown sugar
1/2 cup fish sauce
1/2 cup vegetable oil
1/2 block extra-firm tofu, drained, pressed, and cut into small cubes
2 eggs
2 cups shredded carrot
1 bunch green onions, cut into 1/2-inch pieces
chopped peanuts, crushed red pepper, sugar and vinegar, if desired

Bring a large pot of water to a boil. Remove from heat, add rice noodles, and soak 2 to 3 minutes, until softened. Meanwhile, place bean sprouts in a strainer in the sink. When noodles are softened, pour over the bean sprouts in the colander. Set aside.

In a small bowl, whisk together sauce ingredients: ketchup, lime juice, brown sugar and fish sauce. Set aside.

Wipe out the pot, return to heat, and add vegetable oil over medium-high heat. Add tofu and cook for several minutes, until just beginning to brown. Drain tofu on paper towels, and discard all but a trace amount of oil. Return to heat. Whisk eggs lightly and add to pot, quickly scrambling. Add noodles, bean sprouts, carrots, green onions and sauce. Toss several minutes to distribute vegetables and sauce, until heated through.

Serve with chopped peanuts, crushed red pepper, sugar and vinegar for topping, if desired.

Photobucket

Sunday, April 27, 2008

Irish Soda Bread

Tonight we just foraged for dinner from leftovers and random stuff in the pantry, but I still wanted to cook something, so I whipped up a batch of Irish Soda Bread. I'd never made it before, but had always wanted to. It was soooo easy, and really good! I think it may be a staple from here on out.

Photobucket

Irish Soda Bread

4 cups all-purpose flour
3 Tbsp sugar
1 tsp baking soda
1 Tbsp baking powder
1/2 tsp salt
1 stick butter, melted
1 cup buttermilk
1 egg

Preheat oven to 375.

Combine dry ingredients in a large mixing bowl. In a small bowl, lightly whisk together melted butter, buttermilk and egg. Add wet ingredients to dry ingredients, stirring with a wooden spoon until dry ingredients are moistened and a soft dough is formed. Flour your hands and, keeping the dough in the bowl, knead several times.

Shape into a circle on a baking sheet, and use a sharp knife to cut a X on the top. Brush with a little milk and/or melted butter, if desired. Bake for 45 minutes, or until a toothpick inserted in the center comes out clean.

Weekly Menu - week of April 27

It's that time again! I don't know where this past week went, because it totally flew by, but it's already time to plan our menu for next week. I didn't get a chance to make Pad Thai, so we're having that Monday, but the rest is new stuff that I'm really excited to cook and eat. It looks to be a good week!

The best part? All I need for groceries this week is a jalapeno pepper, a can of coconut milk, a pack of tofu, a bag of lentils, and some hot cock sauce. Seriously, how's that for a cheap grocery week? Nice!

Sunday - Leftovers

Monday - Pad Thai

Tuesday - Bibimbap Leftover Pad Thai

Wednesday -Rice and black beans, French bread

Thursday - Leftovers

Friday - Curry soba soup

Saturday - Coconut milk dal, flat bread

Saturday, April 26, 2008

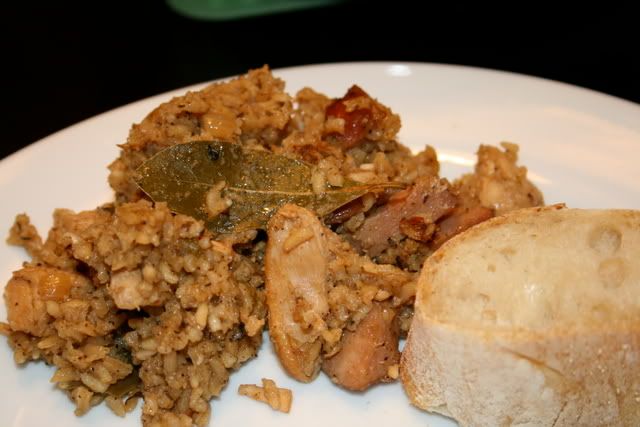
Brad's Sausage & Chicken Jambalaya

Photobucket

When I first met Brad seven years ago, I was thrilled to find out that he enjoyed cooking. A match made in heaven, no? We had been dating for about two weeks when he first cooked for me -- a fabulous dinner of lasagna from scratch. I didn't know any other 24 year old guys who not only cooked their own pasta sauce from scratch, yet alone an entire lasagna. He even cooked the lasagna noodles in garlic and olive oil infused water. I tell you what, I was smitten. I mean, I liked him already, but when I walked into his apartment that day, with the Barenaked Ladies playing on the stereo, and Brad finishing up his sauce, sleeves pushed up on his long-sleeved gray t-shirt, splattered here and there with sauce...yeah, that's the definitive moment when I looked at him and thought "Holy shit. I love this guy." And I still do. ; )

Lasagna's not the only thing he cooks, though. He's an impressive force in the kitchen, never using recipes, just winging it as he goes, adjusting ingredients and seasoning until everything is just right. I wish I could cook with such abandon, but I am, as I've said before, much more of a by-the-book girl. We used to cook dinner together most nights, but kind of fell off that habit when he worked nights for the better part of our first year in Japan, and then -- when he wasn't deployed to Afghanistan -- had a job that often didn't get him home from work in time to pitch in. I think it's something we need to start again, though. I miss cooking together.

This dinner tonight is one of his specialties. He was born and raised in southeast Louisiana, so jambalaya is near and dear. This is another one of the regional dishes I'd never tried before I met him (along with grits, crawfish, red beans and rice, muffalettas, catfish, salty cornbread, sweet tea, and the like), but it quickly became a favorite, and I love when he makes it! Tonight his mom and little brother came over for dinner, so he tackled the entree and I handled French bread and brownies (scroll down for those blog entries).

I've done my best to transcribe his process into a written recipe, and I think this is pretty close. I don't have actual amounts for the cajun seasoning and Tabasco sauce, so you'll just have to taste and tweak as you go, but this is pretty hard to mess up.

Photobucket

Photobucket

Photobucket

Oh, baby!
Photobucket

Photobucket

Photobucket

Photobucket

Brad's Sausage & Chicken Jambalaya

Smoked sausage or andouille sausage link, about 8"
2 boneless, skinless chicken breasts
3 cloves garlic, separated
1 to 2 green bell peppers
1 onion
2 to 3 fresh jalapeno peppers
2 Tbsp olive oil
cajun seasoning
oregano, basil, thyme, crushed red pepper, 2 bay leaves
Tabasco sauce
2 cups rice, uncooked
1 can beer
chicken stock, enough to make 4 cups of liquid when combined with beer


Prepare all ingredients before you start cooking, as follows: slice sausage in half lengthwise, then slice into ½-inch pieces; cut chicken into chunks; dice bell pepper and onion; finely dice jalapenos; mince garlic. Set aside.

Heat olive oil in a heavy skillet over medium-high heat until almost smoking. Add chicken, sausage and 1 clove of garlic; add liberal amounts of cajun seasoning, spices and Tabasco. Cook and stir until cooked through and fairly blackened. The majority of the spices for this dish are added at this point in the recipe, so be sure to check and adjust seasoning as necessary. Remove meat from skillet with a slotted spoon, and set aside, leaving all pan juices and drippings in the skillet.

Add bell pepper, onion, jalapeno and remaining cloves of garlic to the hot skillet, cooking and stirring to get the yummy blackened bits off the bottom of the pan. Cook vegetables until softened and lightly browned. Add dry rice and stir for several minutes to brown. Add chicken stock and beer, stirring well to combine thoroughly.

Cover and simmer 20 to 25 minutes, or until rice is cooked through. Serve with crusty French bread and a green salad.

Julia Child's French Bread

I've been wanting to make Julia Child's French Bread since I saw the Daring Bakers making it not too long ago. French bread that takes all day to make? That's a challenge I'm willing to take! ; ) I had all day today to work on it, and I wanted to make French bread to go with tonight's jambalaya anyway, so I went for it.

Photobucket

All in all, I don't know if it was worth all the trouble. I mean, it was awesome bread, don't get me wrong, but I don't know if it was that much better than bread I can make from scratch in a third of the time. I'm glad I made it, though, since I've been intrigued by the recipe for some time now.

Because the recipe is so ridiculously long, I'm posting it in a separate, backdated entry. If you want to see it, click here.

Photobucket

Mascarpone Brownies

I've seen these Mascarpone Brownies on blogs all over the place, and have really been wanting to try them. The look so dense and chocolately and fabulous that I couldn't resist. I wanted a dessert for this evening that my mother-in-law was coming over for dinner, and this was the first thing I thought of.

(Isn't that a pretty plate, by the way? I bought it at the Daiso (100 Yen Store) in Japan right before we moved, and now I really wish I had bought a whole matching set. So bright and cheery!)
Photobucket

I couldn't get mascarpone at the local grocery store, and didn't really have time to trek all the way out to a bigger store, so I subbed cream cheese whipped with some half-and-half instead. Not having tried the real deal, I don't know how these measured up in taste, but they were absolutely delicious and decadent, and they look just like the pictures I've seen of those made with mascarpone, so I'll call them a success. ; )

I was afraid the kids wouldn't care for them since they're so rich, but they loved them!

Chocolate Mascarpone Brownies
Cookworks Show on Food Network Canada via Recipezaar via The Kitchen Sink

For the Brownies:
1 cup unsalted butter (plus more for preparing pan)
3 ounces semisweet chocolate, finely chopped
1 cup granulated sugar
1/2 cup cocoa powder
1/2 cup mascarpone cheese, softened
3 large eggs, at room temperature
2 teaspoons vanilla extract
1/2 cup all-purpose flour
1/4 teaspoon salt

Preheat oven to 325°. Butter an 8-inch square glass baking pan and set aside.

Place the butter and chocolate in a microwave-safe bowl. Microwave at half power in 30 second intervals, stirring between each heating. Continue until both are completely melted.

Sift sugar and cocoa powder. Add to the butter/chocolate mixture. Beat in (by hand) the mascarpone, eggs, and vanilla extract until smooth. Fold in flour and salt.

Pour batter into pan and spread evenly.

Bake for 45-50 minutes, or until a toothpick inserted in the center comes out clean.

Cool in pan on cooling rack.

For the Ganache:
6 ounces semisweet chocolate, finely chopped
6 tablespoons heavy cream
3 Tablespoons unsalted butter

Place chopped chocolate in a small bowl. Set aside.

In a small saucepan, heat the butter and cream over medium heat, stirring constantly. When mixture is almost boiling, pour over the chocolate. Let stand for 30 seconds. Then, stir until smooth.

Pour ganache over cooled brownies and spread evenly.

Allow ganache to firm before cutting brownies. Brownies may be placed in refrigerator to expedite this.

Photobucket

Friday, April 25, 2008

Oatcakes

Photobucket

Brad first discovered oatcakes when he was deployed to Kabul, Afghanistan, of all places. One of the soldiers he worked with had family send him boxes of Walker's Highland Oatcakes in care packages, and he'd share them with everyone in the office. I've looked for recipes to make them at home, but there seem to be different schools of thought when it comes to oatcakes, with some being thin and cracker-like, and others being more like soft pancakes. I just wasn't sure where to start, not having ever eaten them myself. When we were in the Seattle area for a few weeks this past December, we found some when we were strolling through Port Townsend, Washington! Brad was excited to have them again, and I was excited to finally have a starting point for selecting a recipe.

Then we moved, and I promptly forgot about them. ; )

But today, bored out of my mind, I was thumbing through Nigella Lawson's How To Be A Domestic Goddess cookbook, and saw a recipe for oatcakes! They sounded like they would be fairly similar to the Highland Oatcakes, and only called for a handful of standard pantry ingredients (oats, salt, baking soda, butter and water), so I headed to the kitchen to try them.

I only had old-fashioned oats, not quick-cooking, and I'm not sure if that made a difference or not, but the oats mixture did not form a stiff dough like the cookbook said it would. It just got sticky, and then stickier, so I ended up adding in a little flour to try to get it to a decent texture for kneading. It was still really tacky when I began kneading it on a floured surface, but it was definitely manageable. It rolled out like a dream, too, and then I used a pizza cutter to cut it into rectangles.

Photobucket

They turned out really well! I rolled them a little thinner than I had intended, so they're not as thick as Walker's Oatcakes, but they're still really good. Next time I'll just roll them thicker and see how they turn out. I made a double batch this time, and it made 32 thin crackers, so next time I'll probably make a triple batch and that should make about the same number of thicker ones.

I brought one to Brad, hot out of the oven, and within 20 seconds he was in the kitchen getting a handful. : ) Success! He said that in Kabul everyone liked to eat them with peanut butter, but they're also good with a slice of cheese, or a little butter, or some jam. I bet they'd be really good with Nutella, too...yummmm. I had some today with pumpkin butter, and they hit the spot.

Oh, and they smell like popcorn. Wild, huh?

Photobucket

Oatcakes
adapted from Nigella Lawson's How To Be A Domestic Goddess

2 cups plus 2 Tbsp rolled oats
1/2 cup all-purpose flour
1/4 tsp salt
3/4 tsp baking soda
2 Tbsp melted butter
12 to 28 Tbsp very hot water

Preheat oven to 400.

Combine oats, flour, salt, baking soda and butter in the bowl of a stand mixer. Turn mixer to low, and begin to drizzle in water, one tablespoon at a time, until the mixture forms a sticky dough. Turn dough out onto a liberally floured surface, sprinkle with additional flour, and knead one or two minutes, flouring the surface and your hands as needed.

Roll out to about 1/8 to 1/4 inch thickness. Cut into rectangles or circles, place on an ungreased cookie sheet, and bake 15 to 18 minutes, or until edges are beginning to brown lightly, and the cakes hold their shape. Remove to a cooling rack.

Serve with peanut butter, butter, jam, cheese, Nutella, or whatever you like!

Thursday, April 24, 2008

Vegetable Korma

Tonight's vegetable korma recipe is one I've never tried before. I had kofta korma once at Appughar, our favorite Indian restaurant back in Japan (I miss that place!), but I've never made it at home before. I found a recipe for vegetable korma on allecipes.com, and worked off of that this evening, tweaking it slightly. Oh, and on that note I have to say that I really love Indian food because if it's not vegan to begin with, it's so easy to adapt.

This recipe was really easy, with very little prep work -- just some peeling and dicing -- and a fairly short cooking time. I cubed my potatoes in fairly large chunks, so I had to cook it awhile longer, but next time I'll cut it in a smaller dice so it will cook more quickly.

We ate this tonight with some flat bread. The flavor was incredible -- just a little bit spicy -- and there was just the right amount of gravy so it wasn't too saucy. This is going on the "have again" list for sure. I'm not trying to toot my own horn, but this is really as good as anything we had at Appughar. Delicious!

Photobucket

Vegetable Korma

2 tablespoons vegetable oil
1 medium onion, diced
1 teaspoon minced fresh ginger root
2 cloves garlic, minced
2 potatoes, cut in 1/2-inch dice
4 carrots, cut in 1/2-inch dice
1 fresh jalapeno pepper, chopped
3 tablespoons ground cashews
1 cup tomato sauce
2 teaspoons salt
1/2 tsp cayenne pepper
1 1/2 tablespoons curry powder
1 cup frozen green peas
1/2 green bell pepper, chopped
1/2 red bell pepper, chopped
1 1/2 cup half-and-half (regular or soy) or coconut milk
Fresh cilantro, for garnish

Heat the oil in a skillet over medium heat. Stir in the onion, and cook until tender. Mix in ginger and garlic, and continue cooking 1 minute. Add potatoes, carrots, jalapeno, cashews, tomato sauce, salt, cayenne pepper and curry powder. Cook and stir 10 minutes, or until potatoes are tender.

Stir peas, green bell pepper, red bell pepper, and cream into the skillet. Reduce heat to low, cover, and simmer 10 minutes. Garnish with cilantro to serve.

Tuesday, April 22, 2008

Seriously awesome salad

Photobucket

I came across this recipe awhile back, from The Pioneer Woman's blog, and I've been wanting to try it ever since. It just looked so fresh and fantastic, and wow, you can't beat her pictures of the process!

I put it on my menu ages ago, but kept pushing it off till later, mostly because chopping all those vegetables just seemed like more work than I wanted to deal with. Stupid, stupid, stupid. I finally made it tonight, and it came together SO quickly and easily. It helped, too, that Brad was washing dishes while I did the prep work, so as soon as I finished with a dish or some vegetable remnants, he'd immediately whisk them away to the sink or the garbage. Dude, I love that guy so much it's not even funny. ; )

So yeah, this was way easier than I had expected. And it tasted OMGWTFDELICIOUS!!! ; ) Seriously, it was amazing. If you haven't had this before, you need to go make it. Like yesterday.

I only made a half batch, and even after we ate huge bowl of it, there was still more than half of it left, so don't make the full recipe unless you have a big crowd to serve it to. Oh, and also those jalapenos in the dressing make this stuff SPICY, so use caution. I love it that way and so does Brad, but consider yourself warned.

Photobucket

Asian Noodle Salad
adapted from Jamie Oliver

SALAD INGREDIENTS:
1 packages linguine noodles, cooked, rinsed, and cooled
1/2 to 1 head sliced Napa cabbage
1/2 to 1 head sliced purple cabbage
1/2 to 1 bag baby spinach
1 red bell pepper, sliced thin
1 yellow bell pepper, sliced thin
1 orange bell pepper, sliced thin
1 small bag bean sprouts
3 sliced scallions
3 peeled, sliced cucumbers
LOTS of chopped cilantro—up to one bunch
1 can whole cashews, lightly toasted in skillet

DRESSING:
Juice of 1 lime [Cheryl's note: I used the juice of 2 limes]
8 tablespoons olive oil [Cheryl's note: I only used about 2 Tbsp]
2 tablespoons sesame oil
6 tablespoons soy sauce
1/3 cup brown sugar
3 tablespoons fresh ginger, chopped
2 cloves chopped garlic
2 hot peppers or jalapenos, chopped
More chopped cilantro—LOTS [Cheryl's note: I didn't put cilantro in the dressing because Brad doesn't care for it, and there was already some in the salad]

Mix together salad ingredients. Whisk together dressing ingredients and pour over salad. Mix with tongs or hands and serve on platter.

*Dressing keeps up to three days before serving, WITHOUT cilantro.

TWD - Bill's Big Carrot Cake

Photobucket

This was my first time ever making a carrot cake. I've wanted to for a long time, but all that work of peeling the carrots and shredding them up just seemed like more than I wanted to deal with. Yes, I'm lazy. ; ) So I was really excited when I saw that Amanda of Slow Like Honey had chosen carrot cake as this week's Tuesdays with Dorie recipe! It was just the little nudge I needed to get my butt in gear and make a freaking carrot cake.

We had Brad's family over for dinner on Friday, so it was the perfect opportunity to make the cake and share it with others. I love to bake, as you've probably figured out by now, but I hate having a whole batch of sweets for just the four of us. Dangerous!

I didn't take any pictures of the carrot cake prep, just because I had a lot to do with getting ready for dinner, and didn't have a lot of time for stopping and shooting. I was a little nervous putting the cakes in the oven, as the batter seemed much more carroty than I had expected. Never having made carrot cake before, though, I had no frame of reference. I wasn't sure if the 3 cups of carrots the recipe called for meant 3 cups firmly packed, or 3 cups lightly spooned in, or what, so I ended up going for somewhere in between the two, and just hoped it was right.

I had nothing to worry about, though. This cake turned out beautifully! I mean, it was really, really fantastic, and so much easier than I had anticipated. The cakes baked quickly, and tipped right out of the pan with no trouble at all. They were nicely flat and level, so they stacked up neatly for frosting. I saw that a lot of people had trouble with their cakes sinking, but mine were really nice and flat. I guess I got lucky!

Photobucket

And oooooh, the frosting! The lemon flavoring made all the difference in the world, and elevated cream cheese frosting (which I dare say is near perfect already) into something even more fabulous. My only complaint about the frosting was that it wasn't quite enough to fill and frost the whole cake. It would have been more than enough for just filling between the layers and frosting on top, but I had to spread it pretty thin to cover the whole cake. I actually preferred the thinner layer of frosting when eating, as I hate it when frosting overpowers a cake, but it just didn't look as pretty with the cake showing through in spots. Ah, the dilemma. ; )

I toasted up some coconut and piled it on top of the cake. So pretty! I'll definitely make this cake again!

Photobucket

Bill's Big Carrot Cake
Baking: From My Home to Yours by Dorie Greenspan
Yields 10 servings

Ingredients:

For the cake:
2 cups all purpose flour
2 teaspoons baking powder
2 teaspoons baking soda
2 teaspoons ground cinnamon
¾ teaspoon salt
3 cups grated carrots (about 9 carrots, you can grate them in food processor fitted w/ a shredding a blade or use a box grater)
1 cup coarsely chopped walnuts or pecans
1 cup shredded coconut (sweetened or unsweetened)
½ cup moist, plump raisins (dark or golden) or dried cranberries
2 cups sugar
1 cup canola oil
4 large eggs

For the frosting:
8 ounces cream cheese, room temperature
1 stick ( 8 tablespoons) unsalted butter, at room temperature
1 pound or 3 and ¾ cups confectioners' sugar, sifted
1 tablespoon fresh lemon juice or ½ teaspoon pure lemon extract
½ cup shredded coconut (optional)
Finely chopped toasted nuts and/or toasted shredded coconut (optional)

Getting ready:
Position the racks to divide the oven into thirds and preheat the oven to 325 degrees Fahrenheit. Butter three 9-x-2-inch round cake pans, flour the insides, and tap out the excess. Put the two pans on one baking sheet and one on another.

To make the cake:
Whisk the flour, baking powder, baking soda, cinnamon and salt. In another bowl, stir together the carrots, chopped nuts, coconut, and raisins.
Working with a stand mixer, preferably fitted with a paddle attachment, or with a hand mixer in a large bowl, beat the sugar and oil together on a medium speed until smooth. Add the eggs one by one and continue to beat until the batter is even smoother. Reduce the speed to low and add the flour mixture, mixing only until the dry ingredients disappear. Gently mix the chunky ingredients. Divide the batter among the baking pans.
Bake for 40-50 minutes, rotating the pans from top to bottom and front to back at the midway point, until a thin knife inserted into the centers comes out clean. The cakes will have just started to come away from the sides of the pans. Transfer the cakes to cooling racks and cool for about 5 minutes, then run a knife around the sides of the cakes and unmold them. Invert and cool to room temperature right side up.
The cakes can be wrapped airtight and kept at room temperature overnight or frozen for up to 2 months.

To make the frosting:
Working with a stand mixer, preferably fitted with a paddle attachment or with a hand mixer in a large bowl, beat the cream cheese and butter together until smooth and creamy. Gradually add the sugar and continue to beat until the frosting is velvety smooth. Beat in the lemon juice or extract.
If you'd like coconut in the filling, scoop about half of the frosting and stir the coconut into this position.

To assemble the cake:
Put one layer top side up on a cardboard cake round or a cake plate protected by strips of wax or parchment paper. If you added the coconut to the frosting, use half of the coconut frosting to generously cover the first layer (or generously cover with plain frosting). Use an offset spatula or a spoon to smooth the frosting all the way to the edges of the layer. Top with the second layer, this time placing the cake stop side down, and frost with the remainder of the coconut frosting or plain frosting. Top with the last layer, right side up, and frost the top- and the sides- of the cake. Finish the top with swirls of frosting. If you want to top the cake with toasted nuts or coconut, sprinkle them on now while the frosting is soft.
Refrigerate the cake for 30 minutes, just to set the frosting before serving.

Serving:
This cake can be served as soon as the frosting is set. It can also wait, at room temperature and covered with a cake keeper overnight. The cake is best served in thick slices at room temperature and while it's good plain, it's even better with vanilla ice cream or some lemon curd.

Storing:
The cake will keep at room temperature for 2 to 3 days. It can also be frozen. Freeze it uncovered, then when it's firm, wrap airtight and freeze for up to 2 months. Defrost, still wrapped, overnight in the refrigerator.

Monday, April 21, 2008

Chinese Five Spice Pork Chops

Photobucket

Tonight is our one at-home carnivorous dinner this week. Brad picked up a nice little pack of pork chops yesterday, and since then I've been trying to decide how to cook them. Most often we just sear them in a hot skillet with a little olive oil, seasoned with salt and pepper or cajun seasoning, but tonight I wanted something different. This time I seasoned them with Chinese five spice powder and salt, drizzled them with a little mirin, and then pan fried them in a lightly oiled skillet. For serving, I sliced them and poured the pan juices over. Yumyumyumyumyumyumyum! I made three of them for the two of us, and it was really hard to share that last one. ; )

Photobucket

I'm not posting an actual recipe for these, because they're so ridiculously simple. Just season, drizzle, and fry until done. It doesn't get much easier than that.

Photobucket

Cinnamon Applesauce

Tonight we're having pork chops, and it just doesn't seem right to have them without applesauce. My girls absolutely love fresh applesauce, and so do I, so I cooked up a quick batch this evening to have with dinner. It's so quick and easy to make, and tastes so much better than anything you can get at the store. I like to add a healthy amount of cinnamon when I make it, and a fair amount of sugar (I like mine sweet, what can I say?). I wish I had thought about it beforehand, and I would have tried using blue agave nectar, but it completely slipped my mind. Oh well, next time, right?

On that note, I bought the blue agave nectar awhile back, and haven't used it yet, because I just don't know what to do with it. Any suggestions? I'm afraid to substitute it for sugar in baking, in case it doesn't turn out, but if anyone has tried and true uses for it, I'd love to hear them!

Last time I made applesauce, it was really smooth, but tonight I wanted it to be chunkier, so I held back a couple apples while the rest of the applesauce cooked. Once it was all cooked down and smooth, I diced the remaining apples and added them to the sauce, cooking just until they were tender. Perfect!

Photobucket

Fresh Cinnamon Applesauce

6 Granny Smith apples
1/4 cup water
1/4 to 1/2 cup sugar (brown or white)
1 tsp cinnamon

Peel and core the apples, then cut into chunks. Place in a large saucepan over medium-low heat. Add water. Cover and simmer, stirring occasionally, for 30-45 minutes, or until apples cook down and soften. Add sugar and cinnamon to taste. Serve warm or chilled..

Blue Cheese Grits

I had never eaten grits before I met Brad. You know that scene from My Cousin Vinnie? Where they're in the diner and he's so trepidatious about trying grits for the first time? Yep, that was me. I mean, I figured they must be good because lots of people like them, but I just didn't know for sure. When we were younger, my mom made couscous for a family we had over for dinner, and their kids refused to eat it until their mom told them it was like grits. After that, they couldn't get enough. So given that I love couscous, I figured it stood to reason that I'd like grits, as well.

Brad cooked them for me one morning for breakfast, and I was instantly hooked! They're the perfect side dish for breakfast or dinner, and they're even great for a filling snack.

Making them this way, with blue cheese, is one of our favorite side dishes. It's so easy to make, and it goes particularly well with pork.

Photobucket

Blue Cheese Grits

3 1/2 cups water
3/4 cups grits
1/4 tsp salt
1/4 cup blue cheese

Bring water to a boil in a large saucepan. Slowly whisk in grits when water is boiling rapidly. Reduce heat to low, cover and simmer as directed on the grits package, stirring occasionally. Stir in blue cheese when grits are done. Serve hot.

Sunday, April 20, 2008

Extreme Tots

Brad cooked dinner tonight because I was at a Women's Council welcome tea all afternoon, and especially after spending all morning making the rainbow jello, I just wanted an evening out of the kitchen. Brad's a fantastic cook, lest you get the wrong idea from tonight's menu, and think the only things he can cook are grilled cheese and tater tots. ; ) We just wanted some cheap and easy comfort food for dinner tonight, and Brad, awesome man that he is, stepped up and cooked it.

A month or two ago we were across the street from Sonic, and saw a huge sign advertising their "extreme tots". We were intrigued -- how does one make tots extreme? -- so naturally we drove over to see what they were all about. Turns out they were tater tots smothered in chili and cheese, topped with onions and pickled jalapenos, and drizzled with sour cream. OMG YUM! We ordered some, and they were just as fabulous as they sounded. Totally ghetto food, but sooooo yummy!

This is our own homemade version of extreme tots. Seriously, what's not to like?

Photobucket

Extreme Tots

Frozen tater tots
Chili
Shredded cheddar cheese
Diced onions
PIckled jalapenos
Sour cream

Cook tater tots according to package directions. Heat chili. When tater tots are done cooking, arrange them on a plate, spoon chili over them, sprinkle with cheese, onions and jalapenos, and dollop with sour cream. Serve hot.

Rainbow Jello

Photobucket

This is a fairly time-consuming recipe, but it's totally worth it at the end, especially if you have kids. You can do this in rainbow colors, or customize colors to your event -- red and green for Christmas; orange and yellow for Thanksgiving; green, yellow and purple for Mardi Gras; purple and yellow for LSU tailgating. I went with rainbow colors today. The store was out of blue jello, so I bought some nasty little kids' squeeze bottles of blue punch, and used one of those with unflavored gelatin for the blue layer. It worked.

You can make this in whatever shape pan you want. Bundt pans make a particularly attractive mold, or you can make it in a square or rectangular pan and then cut it into individual squares for serving.

Brad suggested I make purple and yellow ones with vodka for tailgating next football season! Oh, baby!

Rainbow Jello

Small boxes of Jello, in rainbow colors (red, orange, yellow, green, blue, purple, or whatever colors you want)
Cool whip, sour cream or plain yogurt

Grease a pan with baking spray. Clear out a level spot in the refrigerator. Put the prepared pan in the refrigerator to chill.

Add one packet of Jello to 1 cup of boiling water. Stir 2 to 3 minutes to dissolve completely. Pour 2/3 cup of the Jello into the prepared pan, and chill for 15 minutes. Meanwhile, add enough Cool Whip to the remaining Jello to make 2/3 cup. Stir to completely melt the Cool Whip. When first layer has set for 15 minutes, carefully pour Jello/Cool Whip mixture over it, and chill for 15 minutes. Repeat with remaining colors. Once all layers have been poured, allow to chill for at least 2 hours. Unmold onto a serving platter, if desired, or cut into squares and serve.

Note: The way I did this was to mix up the next color as soon as I poured the first layer of the previous color. For example, as soon as I poured the first layer of yellow jello, I heated up water and mixed up the green jello. Once it was dissolved, I poured 2/3 cup of the green jello into another measuring cup, then stirred in the Cool Whip to the rest of it. You need three measuring cups to do it this way. That gives it some time to cool down a little before it's time to pour it into the pan, but not so much time that it begins to set up too much to pour.

Photobucket

Saturday, April 19, 2008

Weekly Menu - week of April 20

Time to plan next week's menu! As I've mentioned many times before, we have really been striving to eat a vegetarian diet at home. I shoot to also avoid dairy products when I can, but to be honest, they're just not something I'm willing to give up completely. ; ) Sometimes we'll have seafood at home, like tuna sandwiches, but I think there have only been 3 or 4 times in the last 4 months that I've cooked with chicken, beef or pork. We eat whatever we want when we're at restaurants or someone's house, so it's not like we're depriving ourselves or anything, but I do sometimes miss cooking meat at home. All that being said, tonight we decided to start having one carnivorous night at home per week. And this week that'll be pork chops, something Brad has really been craving lately.

The rest of the week, though, is decidedly vegetarian, with just a little dairy here and there, like the cheese sandwiches tomorrow, blue cheese in the grits on Monday, and cream in the korma on Thursday. It's all about balance, right? ; )

After planning out this menu, I noticed that it's going to be a fairly noodle-heavy week. I didn't intend that; those are just recipes that sounded good, and hey, that's a good thing because noodles are cheap! We just adopted the most adorable dog on Monday, which was a significant financial outlay by the time we paid for food, supplies, a crate, toys, and so forth, so a cheap menu this week will be a good thing.

And as long as I'm on the subject, here's a picture of our sweet dog, Gretel. Isn't she cute??? She's 5 months old, a nice medium-sized dog at about 25 lbs, and she's so well behaved and sweet. We are so smitten! We ran into some people from her animal shelter at Petco today, and they were so excited to see her. We didn't know this when we adopted her Monday, but she was scheduled to be euthanized this past Thursday, so if we hadn't adopted her, odds are she wouldn't be alive right now. I'm so glad it worked out for all of us!

Photobucket

Ok, now for next week's menu:

Sunday - Grilled cheese sandwiches, extreme tots, rainbow jello

Monday - Chinese five spice pork chops, blue cheese grits, applesauce

Tuesday - Asian Noodle Salad

Wednesday - Peanut noodles Domino's Pizza, 3 for $12 instead. We can't afford NOT to for that price! And we'll have the peanut noodles another time instead.

Thursday - Vegetarian korma and flat bread

Friday - Pad Thai We ate out at Corky's BBQ because we were out running errands until late.

Saturday - leftovers Jambalaya and French bread

Black bean and rice enchiladas

Photobucket

Photobucket

This, and the enchilada sauce, are recipes that I formulated completely on my own, from start to finish, which is very unusual for me. It used to be that I followed recipes to the letter, not veering from the measurements or technique at all, but in the past couple years I've finally begun tweaking recipes. Coming up with a recipe on my own from square one, though, is something I've only done a few times, so I'm very proud of this one. ; )

I already have a great recipe for chicken enchiladas (tweaked from one my mom gave me years ago), but since we try not to eat meat at home, I've been wanting to come up with a vegetarian enchilada recipe. I've seen some with spinach and mushrooms, and others with potatoes and kale, but I wanted something different, and that's when I decided on rice and black beans.

These are super yummy! They're spicy enough to elicit a little pain, but not so much that they're unpleasant to eat. They're very hearty and filling, and also fairly inexpensive to make. Give them a try! If you're not a fan of spicy food, you can omit the chipotle peppers and sauce, and substitute mild Rotel for the original or extra spicy varieties.

Black Bean and Rice Enchiladas

1 Tbsp vegetable oil
1 onion, diced
1 bell pepper, diced
2 cloves garlic, minced
2 Tbsp chipotle peppers, plus 2 Tbsp sauce
1 can Rotel
1 can black beans, drained and rinsed
2 cups cooked rice
16 corn tortillas
3 cups shredded soy cheese
1 batch Red enchilada sauce

Heat vegetable oil in a skillet over medium-high heat. Add onion, and cook and stir several minutes, until onion softens. Add bell pepper and garlic. Cook a few minutes more or until vegetables begin to brown. Stir in chipotle peppers, sauce, Rotel and black beans. Simmer several minutes to heat through. Gently stir in rice, and remove from heat.

Preheat oven to 425. Spread about 2/3 cup enchilada sauce in the bottom of a 9 x 13 baking pan; set aside.

Soften corn tortillas by dipping each side quickly in hot oil and then draining on paper towels, or by heating in the oven (wrap in foil first) or the microwave.

Fill tortillas with 2 to 3 Tbsp filling and 1 Tbsp cheese. Roll and place seam side down in baking pan. Sprinkle with 1 1/2 cups cheese. Pour remaining enchilada sauce over the enchiladas, and sprinkle evenly with remaining cheese. Cover with foil and bake 25 minutes. Remove foil and bake 5 minutes longer.

Red Enchilada Sauce

2 Tbsp olive oil
2 Tbsp flour
2 cloves garlic, minced
1/2 small onion, diced
2 Tbsp tomato paste
1/2 tsp oregano
1/2 tsp basil
2 Tbsp chili powder
2 tsp cumin
1 tsp salt
1/4 tsp black pepper
10 oz tomato sauce
1 1/2 cup water
salt and pepper, to taste

Heat a skillet over medium heat. Add olive oil and flour, stirring constantly until flour is lightly browned. Add garlic and onion, cooking until soft and lightly browned. Add tomato paste, stirring to break up and combine evenly. Add oregano, basil, chili powder, cumin, salt and pepper. Cook and stir for one minute. Add tomato sauce and water. Using an immersion blender, blend mixture until smooth. Increase heat to medium-high, stirring constantly until the mixture boils and thickens slightly. Reduce heat and simmer 5 minutes. Add salt and pepper to taste.

Spanish Rice

Photobucket

Spanish Rice

2 tablespoons vegetable oil
1 cup uncooked long-grain rice
1 onion, chopped
2 cups water
1 (10 ounce) can Rotel
1 teaspoon salt

Heat oil in a deep skillet over medium heat. Saute rice and onion until rice is lightly browned and onions are tender.

Stir in water, Rotel and salt. Cover, and simmer for 20 minutes, or until liquid is absorbed and rice is tender.

Refried Beans

I'd never made refried beans from scratch before, but these were really easy! If you have a slow cooker, you can cook them in there for 8 hours on high. I however, literally haven't used mine in years, so I couldn't find it, and instead just simmered them on the stove all day.

Sadly, I didn't get any pictures because we had company over and I wasn't thinking about it, but they were really good! Meg couldn't get enough of them!

Update! We had leftovers today, and I got a picture. : )

Photobucket

Refried Beans

1 lb dry pinto beans
1 onion, halved
2 cloves garlic, minced
2 tsp salt
water
2 Tbsp shortening or bacon grease

In a large pot, combine beans, onion, garlic and salt. Add enough water to cover by a few inches. Bring to a boil. Reduce heat and simmer several hours, stirring occasionally, until beans are very soft.

Drain beans and reserve liquid. Return pot to burner, and add shortening or bacon grease over medium heat. Add beans, stirring and mashing with the back of a spoon until they reach the desired texture. Add cooking liquid to thin as desired.

Sangria

Photobucket

Sangria

Fruit: at minimum, 2 oranges (one sliced, one squeezed), 1 apple and 1 lemon (sliced). Sliced peaches, bananas, pears or melon are also good.
1/2 cup sugar
1 cup Triple Sec
1 bottle cheap red wine
1 stick cinnamon, if desired

Mix fruit with sugar and Triple Sec; add wine. Add cinnamon stick, if desired. Let sit for at least 2 hours.

Optional: Before serving, add 1 cup 7-Up, Sprite or club soda, or 1/2 cup brandy.

Thursday, April 17, 2008

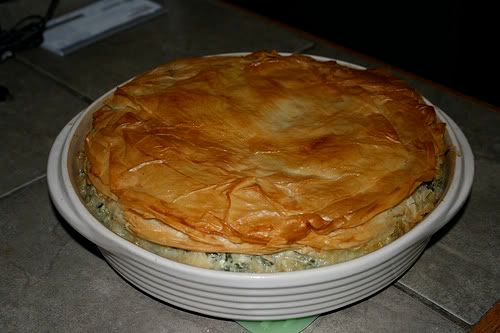
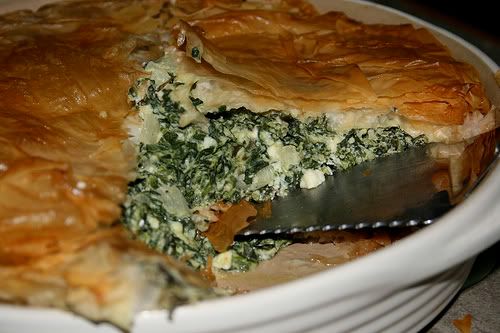
Spanakopita

Update! We had this for leftovers the next couple days, and it was fantastic! I mean, absolutely delicious! Who'd have thought the flavor would improve that much in the fridge? Go figure. And here's a pretty picture from this evening, when we're eating up leftovers.

Photobucket

[original post from 4/15 @ 7:11 PM]
Tonight's dinner was spanakopita. It was good. Not great, but pretty good. I'm going to try a different recipe next time I make it, but in the meantime, the recipe I used is below.

I looked at other recipes after tasting this, and saw that most of them don't call for cottage cheese and cream cheese, nor do they use as many eggs, so I'm definitely trying one of those next time. I felt like the feta got lost in there among the other cheeses, and come on, isn't the feta what we came for in the first place?

I also think that next time I'll spritz the phyllo dough with olive oil instead of brushing it with butter. That'll be faster and easier, as well as a little healthier.

It didn't taste spectacular, but it sure is pretty, isn't it?

Photobucket

Photobucket

Spanakopita

2 Tbsp olive oil
1 large onion, diced
5 eggs
3 10-oz packages of frozen, chopped spinach, defrosted and drained
8 ounces cream cheese
8 ounces feta cheese
8 ounces cottage cheese
1/4 cup Parmesan cheese
salt and pepper
1 1-lb box phyllo pastry
1 stick butter, melted

Heat olive oil in a skillet over medium-high heat. Add onion and cook and stir several minutes, until the onion is soft and begins to brown. Set aside.

With a handheld mixer, beat the eggs until fluffy. Add spinach, cream cheese, feta and parmesan. Stir to combine thoroughly. Season with salt and pepper. Set aside.

Preheat oven to 350.

Using a pastry brush, butter a large, shallow baking dish. Line the bottom of the pan with half the box of phyllo, brushing with butter between each layer. Add spinach filling. Cover with remaining phyllo, brushing with butter between each layer.

Bake 50 minutes, or until crispy and golden brown on top.

Wednesday, April 16, 2008

Cabbage Rolls

Photobucket

I saw these cabbage rolls on Sweets, Savories, Etc. the other day, and have been wanting to make them ever since. We've been trying to eat a vegetarian diet at home, though, so I did some tweaking to the recipe, and substituted Morningstar crumbles for the ground meat. I also sauteed the onion in some olive oil before mixing up the filling, because it just sounded yummy. ; )

This recipe made enough to fill a 9 x 9 baking pan, with some leftover. I think it would easily fill a 9 x 13 pan if you used all the filling and all the cabbage leaves, but 9 x 9 was really all we needed this evening, so that's all I made.

I like how the color of the cabbage leaves is variegated in the pan, as I used leaves from the outside in.

Photobucket

Because I cooked the onion beforehand, and because I didn't have raw meat that needed to cook through while baking, I was also able to shorten the cooking time from 90 minutes to 45. Oh, and I also increased the cooking temperature to 400.

They turned out really well, but we both agreed that the filling was lacking something. Meat perhaps? (har har) They were good, though, and I'd like to try making them again. I think next time I would try adding some vinegar to the filling, or maybe 1/2 to 1 cup of the sauce...just something to make them kind of tangy inside. Overall I do think they'd be far, far better with meat, but there's not a lot I can do about that ; )

Photobucket

Cabbage Rolls

1 large head of cabbage

Filling:
2 Tbsp olive oil
1 large onion, chopped
2 cups cooked rice
1 12-oz pkg vegetarian ground beef substitute
1/2 cup water
2 eggs
1 teaspoon salt
1/2 teaspoon pepper

Sauce:
2 (10 3/4 ounce) cans campbell's condensed tomato soup
1 soup can of water
1 14.5 ounce can pureed tomato sauce
1/2 teaspoon pepper

Remove core from cabbage, and place core-side down in a large pot. Add water to halfway up the cabbage, cover, and bring to a boil. As soon as it reaches a boil, turn off heat, and leave the top on for 20 minutes. Meanwhile, cook rice if necessary.

Preheat oven to 400.

In a large skillet over medium-high heat, add olive oil and onion. Cook and stir several minutes, until onion is translucent. Add ground beef substitute and water. Cook several minutes, until mixture is mostly heated through. Set aside and allow to cool for several minutes. Whisk together eggs, salt and pepper, and stir into onion mixture. Gently stir in the 2 cups cooked rice. Set aside.

Combine all sauce ingredients in a large bowl, and whisk together to combine. Set aside.

When cabbage has finished cooking, remove from water, drain and carefully remove leaves one at a time. Put about 1/4 cup filling at the base of each leaf, folding in the sides and rolling up. Place seam-side down in a baking pan. Arrange all filled cabbage rolls side by side.

Pour sauce over cabbage rolls. Cover tightly with foil, and bake 45 minutes. Serve hot, with sauce spooned over.

Photobucket