
I've been plagued with insomnia lately, much to my chagrin. I'm not a good sleeper to begin with, and have always woken up frequently throughout the night, then fallen right back to sleep. But these past few days I just lie there, desperately tired and desperately trying to fall asleep, to no avail. It's unspeakably frustrating.
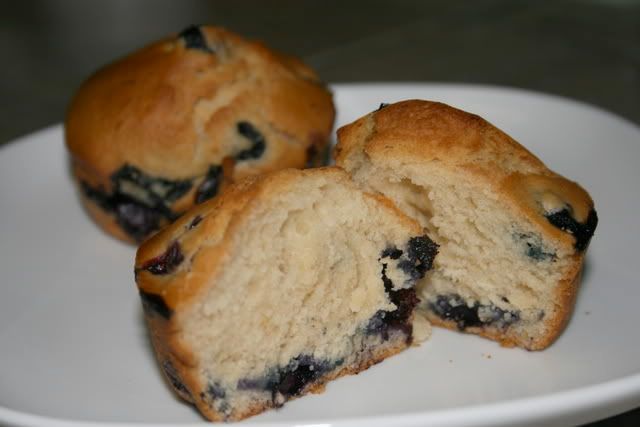
Today, though, I decided to make the most of it, and get up and make blueberry muffins for breakfast before the kids leave for school. I love muffins because they only take a couple minutes to throw together, and only 20-25 minutes to bake. School here doesn't start until 9:00AM, so I don't even have to get up too early in order to have them ready for a hot, tasty breakfast before the kids dart off to school. Muffins rock!
I found this basic recipe on allrecipes.com, and modified it a bit to my liking. They hit the spot!
Blueberry Muffins
1 1/2 cups all-purpose flour
3/4 cup white sugar
1/2 teaspoon salt
2 teaspoons baking powder
1/3 cup vegetable oil
1 egg
1/2 cup milk
1 cup canned blueberries, drained and rinsed well
Preheat oven to 400. Grease muffin cups or line with muffin liners.
Combine flour, cup sugar, salt and baking powder in a large bowl. In a small bowl, whisk together vegetable oil, egg and milk. Add wet ingredients to dry, stirring just until dry ingredients are moistened. Don't overmix. Fold in blueberries. Distribute batter evenly among 12 muffin cups.
Bake for 20 to 25 minutes, or until done.
Showing posts with label breads. Show all posts
Showing posts with label breads. Show all posts
Thursday, May 6, 2010
Tuesday, April 21, 2009
Vegan Banana Bread
I happily stumbled upon this vegan banana bread recipe last Fall, and it's been a staple ever since. The funny thing is, I've never been really successful with banana bread. I've made it dozens of times, non-vegan with eggs and milk and such, but it's never turned out quite right. Then I tried this vegan recipe, and to my surprise and delight, it's the best banana bread I've ever made! It always turns out beautifully, with a nice, slightly crispy crust that is a great contrast to the soft bread. I also love the addition of allspice. It lends a fantastic flavor to the bread that I love. Try it! I'm sure you'll love it, too.
Banana Bread
1/2 cup brown sugar
1/2 cups white sugar
1/2 cup margarine, at room temp
3 very ripe bananas, mashed well
2 cups flour
1/2 teaspoon baking soda
1/4 cup vanilla soy milk, mixed with 1 teaspoon apple cider vinegar
1 teaspoon vanilla
1 teaspoon cinnamon
1/4 teaspoon allspice
1/2 teaspoon salt
Preheat oven to 350 F. Spray a 8x4 bread pan with non stick cooking spray, or lightly coat with margarine.
Sift together flour, baking soda, salt and spices.
Cream together the margarine and sugars. Add bananas, soy milk and vanilla.
Add the wet ingredients to the dry. Mix well. Pour batter into pan. Bake for an hour to an hour 10 minutes.
Wednesday, April 15, 2009
Easy Garlic Knots
When Brad and I visited some friends in Clemson, SC earlier this year, we had dinner at a great little Italian restaurant. Nothing fancy, just cheap, good Italian food. The best part of the meal were the baskets of garlic knots they brought out to the table...lovely little bite-sized knots of french bread, dripping with garlic sauce. I won't lie...we ate an embarrassing amount of them. Tonight I set out to recreate them.
I intended to use this recipe, but it didn't occur to me until too late that I didn't have yeast on hand since we just moved into our house. So instead I ran to the store and bought a tube of Pillsbury french bread dough. I know, I know, that's not cool, but it worked. But if you find yourself in a similar bind, or you aren't a good bread dough maker, or you just want a really easy side dish, try this recipe. They were to die for, and once again, we ate an embarrassing amount.
Easy Garlic Knots
1 tube Pillsbury refrigerated french bread dough
1 large garlic clove
1/4 tsp sea salt
1/4 cup olive oil or melted butter
Heat oven to 375.
Open dough, and cut into 12 equal pieces. Roll each piece into a rope about 6 inches long, and tie in a simple knot. Place on a baking sheet while the oven preheats.
Peel and chop the garlic clove. Using a mortar and pestle, or the flat side of a chef's knife, mash the garlic and salt together until it forms a paste. Stir it into the olive oil or melted butter. Using a pastry brush, liberally brush the garlic mixture onto the knots. Bake 10 to 12 minutes, then remove from oven and baste again with garlic mixture. Return to oven for a few more minutes, until golden brown.
If desired, serve with remaining garlic sauce for dipping.
Thursday, November 13, 2008
Cooking day
I cooked so much today! It's been awhile since I've spent this much time in the kitchen, and it was really fun!
First I made a batch of French bread, although I took the shortcut route and prepared the dough in my seldom used bread maker. I think it's the first time I've used it in about three years, but it really came in handy today on the dough cycle, to be able to just put everything in and let it go to work. I took the dough out mid-afternoon, shaped it into 4 small balls instead of one long loaf, and then baked them on some stoneware. We shared one for a snack, spread with Earth Balance and Marmite (yum!), then had another with some leftover minestrone soup that I made last night (sorry, no pictures of either bread or soup).
While the dough was mixing up in the bread maker, I made some vegan vanilla ice cream using a recipe from A Vegan Ice Cream Paradise. This was my first time making vegan ice cream, and it turned out really well! I made the Fancy Pants Vanilla, and modified it very slightly, using almond milk instead of soy milk (I still used soy creamer), and corn starch instead of arrowroot. I ran it through our cheapo ice cream maker for about 30 minutes, then put it in a container in the freezer to firm up more. I'm really excited to try some other recipes from that blog! I think I see a lot of ice cream in our future...
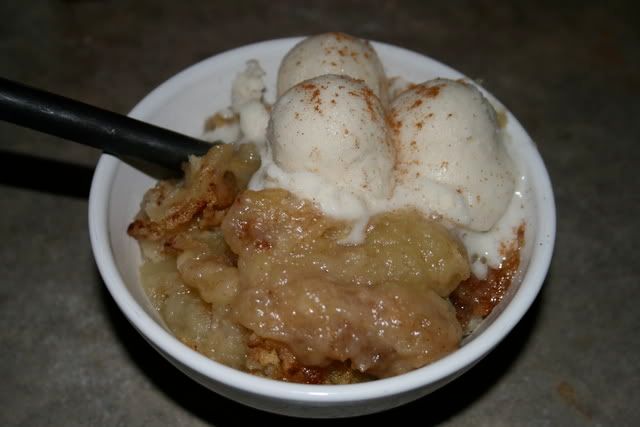
The last thing I made today was apple crisp. I used the recipe that I grew up with, my Grandma's recipe, that has a crumbly strudel-type topping instead of the oat topping most people seem to use. The only thing I changed was subbing Earth Balance margarine for the butter, and I don't know how well that worked. While the apple crisp tasted delicious tonight, for some reason that apples cooked down into mush, and the topping never fully crisped up. I think that real butter may be the key to the perfect crispy, crumbly topping, so if you're not vegan, then by all means stick to the original recipe. I did pop this directly under the broiler for several minutes at the end of the cooking time, which helped somewhat. Regardless, though, this was delicious, even if it was more applesaucy than chunky. I served it topped with several miniature scoops of vanilla ice cream and a sprinkling of cinnamon. So satisfying!
First I made a batch of French bread, although I took the shortcut route and prepared the dough in my seldom used bread maker. I think it's the first time I've used it in about three years, but it really came in handy today on the dough cycle, to be able to just put everything in and let it go to work. I took the dough out mid-afternoon, shaped it into 4 small balls instead of one long loaf, and then baked them on some stoneware. We shared one for a snack, spread with Earth Balance and Marmite (yum!), then had another with some leftover minestrone soup that I made last night (sorry, no pictures of either bread or soup).
While the dough was mixing up in the bread maker, I made some vegan vanilla ice cream using a recipe from A Vegan Ice Cream Paradise. This was my first time making vegan ice cream, and it turned out really well! I made the Fancy Pants Vanilla, and modified it very slightly, using almond milk instead of soy milk (I still used soy creamer), and corn starch instead of arrowroot. I ran it through our cheapo ice cream maker for about 30 minutes, then put it in a container in the freezer to firm up more. I'm really excited to try some other recipes from that blog! I think I see a lot of ice cream in our future...
The last thing I made today was apple crisp. I used the recipe that I grew up with, my Grandma's recipe, that has a crumbly strudel-type topping instead of the oat topping most people seem to use. The only thing I changed was subbing Earth Balance margarine for the butter, and I don't know how well that worked. While the apple crisp tasted delicious tonight, for some reason that apples cooked down into mush, and the topping never fully crisped up. I think that real butter may be the key to the perfect crispy, crumbly topping, so if you're not vegan, then by all means stick to the original recipe. I did pop this directly under the broiler for several minutes at the end of the cooking time, which helped somewhat. Regardless, though, this was delicious, even if it was more applesaucy than chunky. I served it topped with several miniature scoops of vanilla ice cream and a sprinkling of cinnamon. So satisfying!

Wednesday, October 1, 2008
Vegan MOFO: Aloo Palak with Naan
Ok, so I haven't officially signed up to participate in Vegan MOFO because I'm afraid they may reject me since I'm not 100% vegan 100% of the time. But I'm going to participate on my own, if not part of the official group. So here is my first post for this Vegan Month of Food. Even if this blog event doesn't sway everyone to go vegan or vegetarian, my hope is that it will at least encourage people to cut back on the amount of meat they eat on a regular basis. That's how Brad and I got started on this adventure. A few years ago, we decided to try the so-called Flexatarian mode of eating, which just means we made it a point to prepare meat-free meals several times each week (in fact, I think we may have started out with just one or two days, to tell you the truth). That went so well that we decided to eat vegetarian at home when we moved here, and only eat meat when we were out. Admittedly, we fudged a few times and had some pork chops, hot wings, and a few other meatful meals, but overall I'm proud of us for sticking to it as much as we did.
Through that process, and all the information I came across while looking for vegetarian and vegan recipes online and in books, I was blown away by all the evidence that pointed to a vegan diet as the healthiest way one can eat. Wow! I really never knew nor expected that! I also was shocked to learn so much about the global ramifications of a meat-eating diet, the way animals-for-food are raised and treated. Given that, and given that I have led a fairly unhealthy lifestyle up until now, and given that I need to lose a LOT of weight (and by "a lot", I mean more than 100 pounds), it just made sense, and I decided to go primarily vegan back in mid-June. Since then, I have lost 30 pounds, and feel better than I ever have before! I do still eat dairy on occasion, I'll freely admit, but I stay vegan a good 95% of the time, if not more. Looking back and seeing how I have progressed to this point, though, I imagine it won't be long before I'm completely dairy-free. But I'm content to take it one step at a time. Even one year ago, I never in a million years would have seen myself where I am now. I was one of those who said vehemently that "I could never give up meat", or "I would die without cheese", and yet here I am. And I'm so glad I've made the choice to do so!
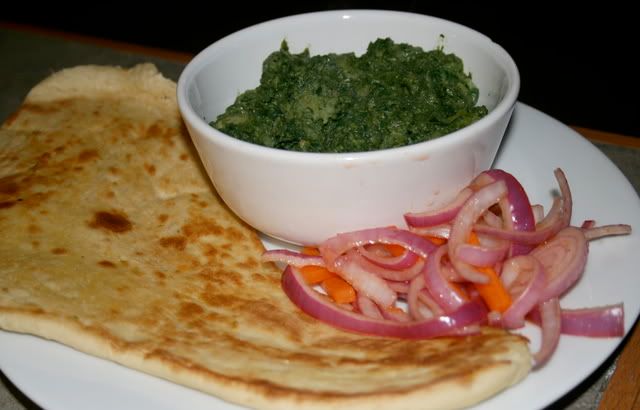
Now, let's talk about tonight's dinner! It was so delicious! I did heavily modify the Aloo Palak recipe that I found here, and I combined several naan recipes I found around the internet in order to come up with what you see here. I'm immensely pleased with the naan -- it's the best I've had homemade to date -- and the Aloo Palak was incredibly satisfying and delicious...although with all the changes I made to it, I don't know if you can even call it Aloo Palak anymore. I'll just call it "good". I also made another batch of the Spicy Onion and Carrot Pickle we had last night, albeit minus the cilantro, since we were out. Great dinner!
Here are the recipes:
Aloo Palak
2 large potatoes
2 Tsbp olive oil
1 tsp olive oil
1 jalapeno, finely chopped
1 Tbsp fresh ginger, grated
1 tsp chili powder
1/2 tsp cumin
1/2 tsp turmeric
2 bags baby spinach, coarsely chopped
1 cup soy milk (or more or less, as desired)
Scrub potatoes, poke several times with a fork, and microwave 10 minutes on high (or you can bake them, but nuking is faster). When cool enough to handle, slip off the skins, and cut into large chunks, about 1" square.
Heat 2 Tbsp olive oil in a large skillet over medium-high heat. When hot, add potato chunks. Cook and gently stir until lightly browned. Remove from skillet and set aside.
In the same skillet over medium-high heat, heat remaining 1 tsp olive oil. Add jalapeno, ginger, chili powder, cumin and turmeric. Cook and stir several minutes, until jalapeno begins to soften. Add spinach. Cook and stir until spinach begins to break down. Puree using an immersion blender, if desired. Gradually stir in soy milk, until desired consistency is reached. It should be fairly thick, not runny, but not solid, either. Just go with what looks good to you.
Add potatoes and gently stir into the spinach mixture until heated through. Serve with naan.
------------------------------------------------------
Naan
1 1/2 cups warm water
2 pkgs yeast
1 Tbsp agave nectar
5 Tbsp soy milk
4 Tbsp olive oil
4 to 5 cups flour
2 tsp salt
1/2 tsp baking soda
additional olive oil
Sprinkle yeast over warm water, stir to dissolve, and set aside for 10 minutes, until yeast is foamy. Stir in the agave nectar, soy milk and olive oil. In the bowl of a stand mixer, combine 4 cups of the flour, the salt and baking soda; stir together. With the mixer on low, and using the paddle attachment, add yeast mixture to the flour mixture. When flour is thoroughly incorporated, switch from the paddle attachment to the dough hook. The dough will be very soft and sticky. Add additional flour as needed to form a very soft dough. It should still be soft and fairly sticky, but should form a smooth ball. Continue to knead with the dough hook for 5 minutes. Shape dough into a ball, and place smooth side down in a greased bowl, turning to coat (the smooth side will be up at that point). Cover with a clean dishcloth and let rise 1 hour, until doubled in bulk.
Place a pizza stone in the oven, and heat oven to 500 degrees for at least 30 minutes, to heat the stone thoroughly. After 30 minutes, turn the broiler on high.
Punch down the dough, and knead 20-30 times. Pull off a baseball sized chunk of the dough, roll to a little thinner than 1/2-inch. Lightly wet your hands with water, and pat the dough between your hands to moisten slightly. Drape the dough onto the pizza stone, and cook 2 to 3 minutes. Brush lightly with olive oil, flip over, and bake 1 to 2 minutes longer, until golden brown. The naan should still be somewhat soft. Remove from the oven, and brush lightly with a little more olive oil if desired. Repeat with remaining dough.
Yield: 6 to 8 naan.
Through that process, and all the information I came across while looking for vegetarian and vegan recipes online and in books, I was blown away by all the evidence that pointed to a vegan diet as the healthiest way one can eat. Wow! I really never knew nor expected that! I also was shocked to learn so much about the global ramifications of a meat-eating diet, the way animals-for-food are raised and treated. Given that, and given that I have led a fairly unhealthy lifestyle up until now, and given that I need to lose a LOT of weight (and by "a lot", I mean more than 100 pounds), it just made sense, and I decided to go primarily vegan back in mid-June. Since then, I have lost 30 pounds, and feel better than I ever have before! I do still eat dairy on occasion, I'll freely admit, but I stay vegan a good 95% of the time, if not more. Looking back and seeing how I have progressed to this point, though, I imagine it won't be long before I'm completely dairy-free. But I'm content to take it one step at a time. Even one year ago, I never in a million years would have seen myself where I am now. I was one of those who said vehemently that "I could never give up meat", or "I would die without cheese", and yet here I am. And I'm so glad I've made the choice to do so!
Now, let's talk about tonight's dinner! It was so delicious! I did heavily modify the Aloo Palak recipe that I found here, and I combined several naan recipes I found around the internet in order to come up with what you see here. I'm immensely pleased with the naan -- it's the best I've had homemade to date -- and the Aloo Palak was incredibly satisfying and delicious...although with all the changes I made to it, I don't know if you can even call it Aloo Palak anymore. I'll just call it "good". I also made another batch of the Spicy Onion and Carrot Pickle we had last night, albeit minus the cilantro, since we were out. Great dinner!

Here are the recipes:
Aloo Palak
2 large potatoes
2 Tsbp olive oil
1 tsp olive oil
1 jalapeno, finely chopped
1 Tbsp fresh ginger, grated
1 tsp chili powder
1/2 tsp cumin
1/2 tsp turmeric
2 bags baby spinach, coarsely chopped
1 cup soy milk (or more or less, as desired)
Scrub potatoes, poke several times with a fork, and microwave 10 minutes on high (or you can bake them, but nuking is faster). When cool enough to handle, slip off the skins, and cut into large chunks, about 1" square.
Heat 2 Tbsp olive oil in a large skillet over medium-high heat. When hot, add potato chunks. Cook and gently stir until lightly browned. Remove from skillet and set aside.
In the same skillet over medium-high heat, heat remaining 1 tsp olive oil. Add jalapeno, ginger, chili powder, cumin and turmeric. Cook and stir several minutes, until jalapeno begins to soften. Add spinach. Cook and stir until spinach begins to break down. Puree using an immersion blender, if desired. Gradually stir in soy milk, until desired consistency is reached. It should be fairly thick, not runny, but not solid, either. Just go with what looks good to you.
Add potatoes and gently stir into the spinach mixture until heated through. Serve with naan.
------------------------------------------------------
Naan
1 1/2 cups warm water
2 pkgs yeast
1 Tbsp agave nectar
5 Tbsp soy milk
4 Tbsp olive oil
4 to 5 cups flour
2 tsp salt
1/2 tsp baking soda
additional olive oil
Sprinkle yeast over warm water, stir to dissolve, and set aside for 10 minutes, until yeast is foamy. Stir in the agave nectar, soy milk and olive oil. In the bowl of a stand mixer, combine 4 cups of the flour, the salt and baking soda; stir together. With the mixer on low, and using the paddle attachment, add yeast mixture to the flour mixture. When flour is thoroughly incorporated, switch from the paddle attachment to the dough hook. The dough will be very soft and sticky. Add additional flour as needed to form a very soft dough. It should still be soft and fairly sticky, but should form a smooth ball. Continue to knead with the dough hook for 5 minutes. Shape dough into a ball, and place smooth side down in a greased bowl, turning to coat (the smooth side will be up at that point). Cover with a clean dishcloth and let rise 1 hour, until doubled in bulk.
Place a pizza stone in the oven, and heat oven to 500 degrees for at least 30 minutes, to heat the stone thoroughly. After 30 minutes, turn the broiler on high.
Punch down the dough, and knead 20-30 times. Pull off a baseball sized chunk of the dough, roll to a little thinner than 1/2-inch. Lightly wet your hands with water, and pat the dough between your hands to moisten slightly. Drape the dough onto the pizza stone, and cook 2 to 3 minutes. Brush lightly with olive oil, flip over, and bake 1 to 2 minutes longer, until golden brown. The naan should still be somewhat soft. Remove from the oven, and brush lightly with a little more olive oil if desired. Repeat with remaining dough.
Yield: 6 to 8 naan.
Wednesday, July 2, 2008
Ice cream, sorbet, and TWD scones
This is going to be really short, unfortunately, because it's late and I'm just now getting a chance to sit down and blog. Busy day! Let me just do a quick recap, then I'm off to bed.
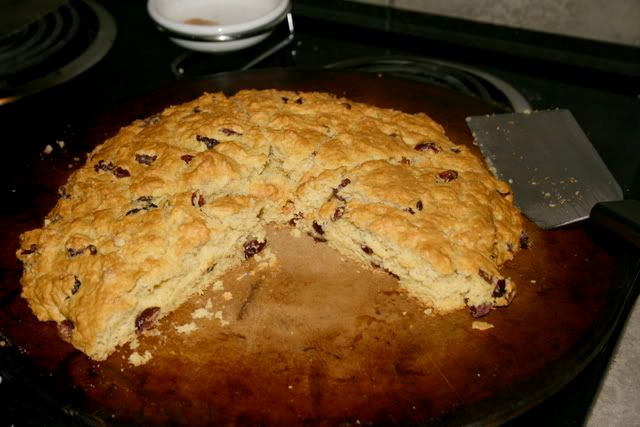
I'll start with the TWD scones. They're awesome! Since I'm trying to not eat dairy, and Brad doesn't care for dried apples, I just made cranberry scones instead. Some of the changes I made:
I soaked some Craisins in hot water to plump them up, instead of dried apples
I omitted the cheddar cheese
I used soy milk with vinegar in place of the buttermilk, and a mixture of soy milk and water instead of apple juice,
Instead of an egg, I used 1 Tbsp ground flax seed mixed with 3 Tbsp water, and an additional 1 1/2 Tbsp baking powder,
Instead of butter, I used all-vegetable shortening.
It worked really well! Brad, his mom, and the kids all loved them! I'm still amazed that the egg and buttermilk replacements worked that seamlessly in this recipe. And I absolutely love what the little bit of cornmeal added to the scones! I never would have thought to include that!
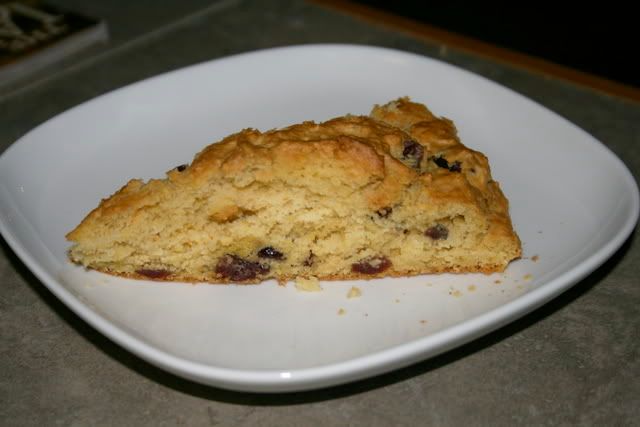
I give these scones a huge thumbs up! Woohoo!
Next let's move on to the frozen desserts I made yesterday and today. I ended up not bringing the vanilla custard to work to make ice cream, because it separated and was all weird this morning when I got it out of the fridge. I did bring the pineapple-orange-ginger sorbet, though, and it turned out beautifully! So yummy! Brad bought an ice cream maker on the way home today (after not being able to find one yesterday), and I put the custard in to freeze. I didn't eat it because of the whole dairy thing, but the kids loved it. Hooray!

The sorbet is by far my favorite, though. The orange and pineapple are so fruity and tropical, and the little bit of ginger I added really enhanced the flavors and gave it a nice kick. I love this stuff! But I did that one better. I put it in a glass like so:

...and the I topped it off with Malibu coconut rum. Oh, baby! What an incredible drink! I may have to just keep some sorbet on hand all the time so I can have one of these whenever I want. YUM!

Off to bed for this tired girl. Good night!
Tuesday, June 17, 2008
Vegan Blueberry Muffins
I promised my co-workers that I'd bring in some goodies, so I whipped up a batch of blueberry muffins to bring in tomorrow. It was also a good excuse to try a vegan muffin recipe.
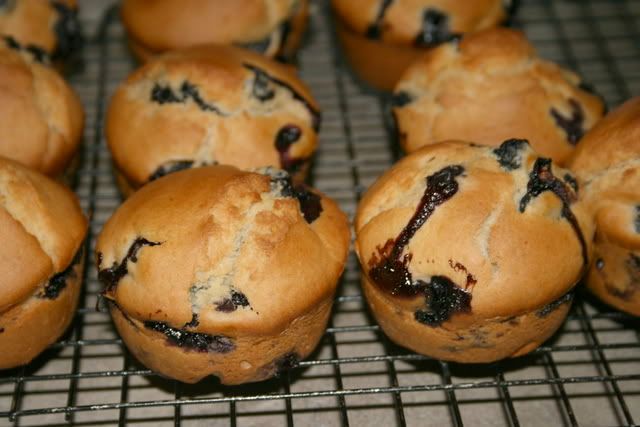
I made some regular muffins, and some mini muffins. Because, come on, miniature food is just cool.

These were good, but it was my first time cooking with blue agave nectar, and I think next time I'd increase it to 3/4 cup. These weren't very sweet, which on one hand was kind of refreshing, but on the other hand, was a little disappointing.
Vegan Blueberry Muffins
3 cups flour
4 tsp baking powder
1 tsp salt
1/2 cup blue agave nectar
1 cup soy, almond or rice milk
1/3 cup vegetable oil
2 cups fresh or frozen blueberries
Preheat oven to 400. Grease a muffin pan with cooking spray.
In a large mixing bowl, combine flour, baking powder and salt. In a large measuring cup, combine agave nectar, milk and oil. Whisk together to mix thoroughly. Add wet ingredients to dry ingredients. Stir just until dry ingredients are moistened. Do not over-mix. Gently fold in blueberries.
Fill muffin cups to 3/4 full. Bake 20 to 25 minutes for standard muffins, or 10 to 12 minutes for mini muffins.

Sunday, May 18, 2008
Soda Crackers
This is my first time making soda crackers from scratch. It was really fun! Another time when I don't have as much going on, I'd like to try cutting them into prettier shapes, or baking them in one perforated sheet, then breaking them apart once they've cooled, but today I just did squares. And lopsided squares, at that, since I didn't have a ruler. ; )
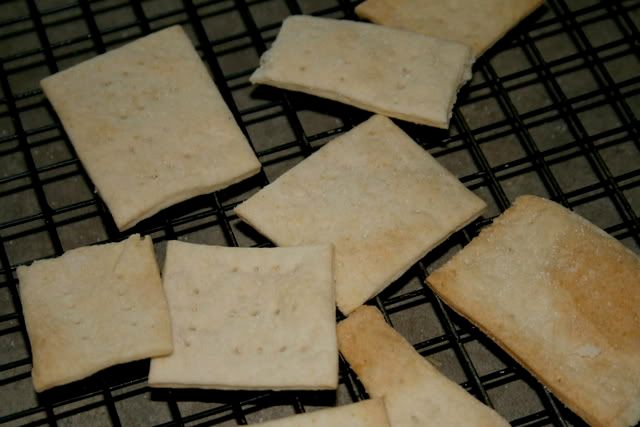
I used vegetable shortening and soy milk, to make this a vegan recipe.
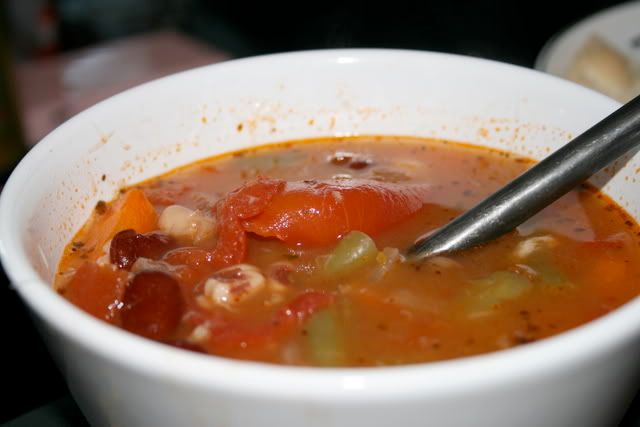
We ate these tonight with some vegetable soup. I'm not going to post it as a recipe since for me, vegetable soup is one of those "just throw it together with what you happen to have on hand" things. Tonight I used onion, celery, carrots, garlic, crushed tomatoes, kidney beans, green beans, black eyed peas, vegetable stock and water. Yum, yum, yum!
Soda Crackers
2 cups flour
1/2 tsp baking powder
1/3 cup plus 2 Tbsp shortening
2/3 cup soy milk
Preheat oven to 375.
Combine flour and baking powder in a medium mixing bowl. Cut in shortening. Stir in soy milk to form a dough. Gather dough into a ball, and divide in half. Roll out one portion of the dough to 1/8-inch thickness. Cut into squares and place on a baking sheet. Prick each square several times with a fork. Sprinkle with salt.
Bake 10 to 12 minutes, or longer as needed, until the crackers are crisp and just beginning to brown lightly. Keep an eye on them, as the time may vary widely with different types of baking sheets. Remove crackers to a rack, and cool completely.

I used vegetable shortening and soy milk, to make this a vegan recipe.
We ate these tonight with some vegetable soup. I'm not going to post it as a recipe since for me, vegetable soup is one of those "just throw it together with what you happen to have on hand" things. Tonight I used onion, celery, carrots, garlic, crushed tomatoes, kidney beans, green beans, black eyed peas, vegetable stock and water. Yum, yum, yum!

Soda Crackers
2 cups flour
1/2 tsp baking powder
1/3 cup plus 2 Tbsp shortening
2/3 cup soy milk
Preheat oven to 375.
Combine flour and baking powder in a medium mixing bowl. Cut in shortening. Stir in soy milk to form a dough. Gather dough into a ball, and divide in half. Roll out one portion of the dough to 1/8-inch thickness. Cut into squares and place on a baking sheet. Prick each square several times with a fork. Sprinkle with salt.
Bake 10 to 12 minutes, or longer as needed, until the crackers are crisp and just beginning to brown lightly. Keep an eye on them, as the time may vary widely with different types of baking sheets. Remove crackers to a rack, and cool completely.
Wednesday, May 14, 2008
Vegan Cornbread

I've been on a quest for a long time to replicate Brad's great-grandmother's cornbread. Granny Smith evidently made the most fabulous cornbread anyone has ever tasted. Sadly, I never had a chance to try it for myself, so I've kind of been flying blind here. I must have made two dozen different cornbread recipes over the past year, and I've come close, Brad tells me, but never quite gotten there. I'm a yankee, you know, so my experience with cornbread has been mostly sweet and fluffy, not the dense, gritty, often flourless cornbread that y'all are familiar with down here.
Brad's stepmom Jaimie made cornbread when my parents were visiting. I didn't know that she had Granny's recipe (I was under the impression all this time that Granny had never shared her recipe before she passed away), and it turns out that after all my attempts at making it from scratch, Granny actually used a mix. Go figure. She doctored it up some, so it wasn't just a straight mix out of box, but I was still surprised, as you can imagine. Kind of like that episode of Friends where Monica spends forever trying to make chocolate chip cookies like Phoebe's grandma, only to find out that they were just the cookies from the back of the bag of chocolate chips. ; ) I haven't gotten the recipe from Jaimie yet, so I haven't tried it for myself, but I'm looking forward to it!
We wanted cornbread with our rice and beans tonight, and since I didn't have any buttermilk on hand, I decided to go ahead and try making vegan cornbread. I mean, come on...cornbread isn't really worth making without buttermilk anyway, so I might as well try the vegan way, right? I based my recipe on this one from Post Punk Kitchen, but modified it somewhat.
The results? Holy crap. I think this is my favorite cornbread I've EVER made. I wasn't even expecting to like it, to be perfectly honest, but it was incredible! Brad tried it before me, and said it was good. I asked if it was good for vegan cornbread, or just plain good for cornbread, period. He said it was good for cornbread, period. Yes!
You could make this lighter by leaving out the shortening in the skillet. But why would you want to?
Oh, and I like to put honey on my cornbread, but Brad said that's a bastardization of everything that is Southern cornbread. I say, whatever, dude. This yankee don't care.
Southern Vegan Cornbread
1/4 cup vegetable shortening
1 cup soy milk
1 tsp vinegar
1 cup cornmeal
1/2 cup flour
1 tsp baking powder
1 tsp salt
1/4 cup canola oil
Place shortening in a shallow cast iron skillet. Set oven to 400 degrees, and place the skillet and shortening in it while it preheats.
While the oven is heating, mix the batter. In a small bowl, combine soy milk and vinegar. In a medium mixing bowl, whisk together cornmeal, flour, baking powder and salt. Add canola oil to soy milk mixture, whisk together, and pour into cornmeal mixture. Stir just until combined.
When the oven is heated, remove hot skillet from oven, and pour the batter into the hot oil. It should be hot enough to sizzle at this point when you pour the batter in. Using a small spoon, scoop up some of the melted shortening that rises up around the edges, and drizzle it over the top of the batter.
Bake 20 minutes, or until golden brown. Let cool in the pan for a few minutes, then invert it onto a plate. Cut into wedges and serve.
Monday, May 5, 2008
Spicy Basil Cheese Bread

Look what my sweetie made! We had some incredible leftover bread from the pan bagnat I made earlier, so Brad threw these together in less than ten minutes. Aren't they beautiful? He wasn't going off of a recipe, just off the cuff, and they totally hit the spot.

For lack of a more creative name, we're dubbing these:
Spicy Basil Cheese Bread
2 soft sandwich rolls
1 Tbsp olive oil
1 tsp dried oregano
4 slices provolone cheese
fresh basil leaves
crushed red pepper
fresh ground black pepper
Preheat broiler.
Split sandwich rolls horizontally. Place cut-side up under broiler for 1 minute, just to lightly crisp, but not brown them. Remove from broiler. Brush cut surfaces with olive oil, and sprinkle with oregano. Place back under broiler for 1 to 2 minutes, until edges begin to brown lightly. Remove from broiler again, and top with cheese. Place back under broiler just long enough for the cheese to begin melting. Remove from broiler (yes, again), and top with basil leaves, as little or as much as you want. Return to broiler, and broil for 1 to 2 minutes, or until cheese is melted and basil begins to wilt. Sprinkle with red pepper and black pepper. Serve warm.

Saturday, May 3, 2008
Pumpkin Oat Muffins

The kids and I made these pumpkin oat muffins for breakfast this morning. They were, like most muffin recipes, very quick to mix up and stick in the oven. I tweaked the recipe a bit because I didn't have a couple things it called for, but they still turned out well, and it was fun to cook with the kids!
I don't usually care for oats in muffins. I think it makes them too dense and chunky, but it works really well in these. The oats just disappear into the muffin, and you can't even tell they're there, but it's great to sneak in their health benefits where you can. The muffins are hearty and filling, but not dense.

These would also be good if you substituted chocolate chips for the raisins, but I was shooting for something a little healthier today. ; )
Pumpkin Oat Muffins
Modified from Sesame Street: C is for Cooking cookbook
1 1/2 cups all-purpose flour
2 tsp baking powder
1/2 tsp baking soda
1/4 tsp salt
1/2 tsp cinnamon
1/2 tsp cloves
1/2 tsp allspice
1 egg
2/3 cup packed brown sugar
1/4 cup vegetable oil
1/2 cup canned pumpkin
1/4 cup fat-free sour cream
1/4 cup low-fat ricotta cheese
1 cup uncooked oatmeal
1/2 cup raisins
Preheat oven to 350. Grease 12 muffin cups.
Whisk together dry ingredients, except for oatmeal and raisins, in a small bowl. Whisk together wet ingredients in a large bowl. Add dry ingredients to wet ingredients, stirring just until dry ingredients are moistened. Gently stir in the oatmeal and raisins, just until incorporated.
Divide batter among muffin cups. They will be slightly more than 3/4 full. Bake at 350 for 25 minutes, or until a toothpick inserted in the center comes out clean. Remove to a cooling rack.
Store in a covered container for up to 3 days.

Sunday, April 27, 2008
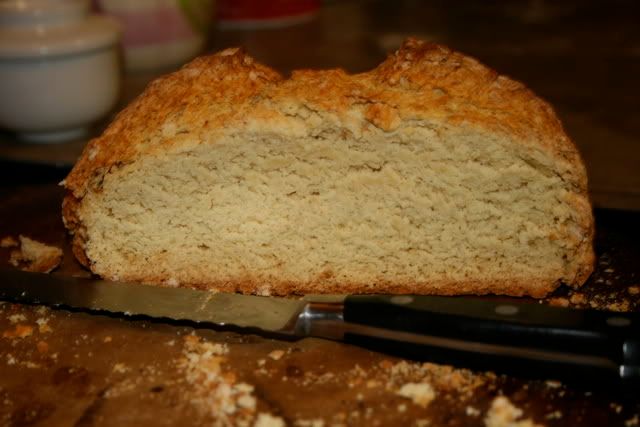
Irish Soda Bread
Tonight we just foraged for dinner from leftovers and random stuff in the pantry, but I still wanted to cook something, so I whipped up a batch of Irish Soda Bread. I'd never made it before, but had always wanted to. It was soooo easy, and really good! I think it may be a staple from here on out.
Irish Soda Bread
4 cups all-purpose flour
3 Tbsp sugar
1 tsp baking soda
1 Tbsp baking powder
1/2 tsp salt
1 stick butter, melted
1 cup buttermilk
1 egg
Preheat oven to 375.
Combine dry ingredients in a large mixing bowl. In a small bowl, lightly whisk together melted butter, buttermilk and egg. Add wet ingredients to dry ingredients, stirring with a wooden spoon until dry ingredients are moistened and a soft dough is formed. Flour your hands and, keeping the dough in the bowl, knead several times.
Shape into a circle on a baking sheet, and use a sharp knife to cut a X on the top. Brush with a little milk and/or melted butter, if desired. Bake for 45 minutes, or until a toothpick inserted in the center comes out clean.
Saturday, April 26, 2008
Julia Child's French Bread
I've been wanting to make Julia Child's French Bread since I saw the Daring Bakers making it not too long ago. French bread that takes all day to make? That's a challenge I'm willing to take! ; ) I had all day today to work on it, and I wanted to make French bread to go with tonight's jambalaya anyway, so I went for it.
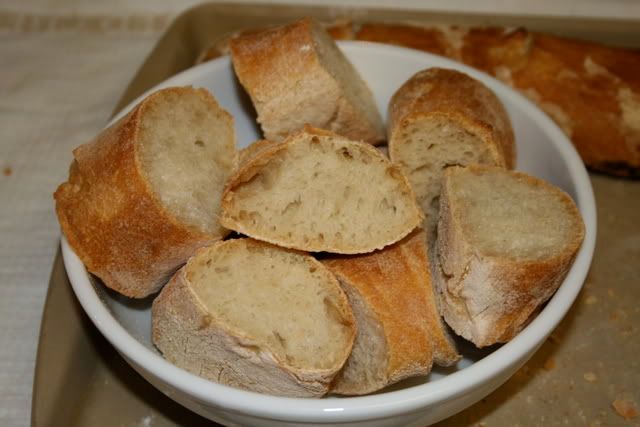
All in all, I don't know if it was worth all the trouble. I mean, it was awesome bread, don't get me wrong, but I don't know if it was that much better than bread I can make from scratch in a third of the time. I'm glad I made it, though, since I've been intrigued by the recipe for some time now.
Because the recipe is so ridiculously long, I'm posting it in a separate, backdated entry. If you want to see it, click here.

Friday, April 25, 2008
Oatcakes

Brad first discovered oatcakes when he was deployed to Kabul, Afghanistan, of all places. One of the soldiers he worked with had family send him boxes of Walker's Highland Oatcakes in care packages, and he'd share them with everyone in the office. I've looked for recipes to make them at home, but there seem to be different schools of thought when it comes to oatcakes, with some being thin and cracker-like, and others being more like soft pancakes. I just wasn't sure where to start, not having ever eaten them myself. When we were in the Seattle area for a few weeks this past December, we found some when we were strolling through Port Townsend, Washington! Brad was excited to have them again, and I was excited to finally have a starting point for selecting a recipe.
Then we moved, and I promptly forgot about them. ; )
But today, bored out of my mind, I was thumbing through Nigella Lawson's How To Be A Domestic Goddess cookbook, and saw a recipe for oatcakes! They sounded like they would be fairly similar to the Highland Oatcakes, and only called for a handful of standard pantry ingredients (oats, salt, baking soda, butter and water), so I headed to the kitchen to try them.
I only had old-fashioned oats, not quick-cooking, and I'm not sure if that made a difference or not, but the oats mixture did not form a stiff dough like the cookbook said it would. It just got sticky, and then stickier, so I ended up adding in a little flour to try to get it to a decent texture for kneading. It was still really tacky when I began kneading it on a floured surface, but it was definitely manageable. It rolled out like a dream, too, and then I used a pizza cutter to cut it into rectangles.

They turned out really well! I rolled them a little thinner than I had intended, so they're not as thick as Walker's Oatcakes, but they're still really good. Next time I'll just roll them thicker and see how they turn out. I made a double batch this time, and it made 32 thin crackers, so next time I'll probably make a triple batch and that should make about the same number of thicker ones.
I brought one to Brad, hot out of the oven, and within 20 seconds he was in the kitchen getting a handful. : ) Success! He said that in Kabul everyone liked to eat them with peanut butter, but they're also good with a slice of cheese, or a little butter, or some jam. I bet they'd be really good with Nutella, too...yummmm. I had some today with pumpkin butter, and they hit the spot.
Oh, and they smell like popcorn. Wild, huh?

Oatcakes
adapted from Nigella Lawson's How To Be A Domestic Goddess
2 cups plus 2 Tbsp rolled oats
1/2 cup all-purpose flour
1/4 tsp salt
3/4 tsp baking soda
2 Tbsp melted butter
12 to 28 Tbsp very hot water
Preheat oven to 400.
Combine oats, flour, salt, baking soda and butter in the bowl of a stand mixer. Turn mixer to low, and begin to drizzle in water, one tablespoon at a time, until the mixture forms a sticky dough. Turn dough out onto a liberally floured surface, sprinkle with additional flour, and knead one or two minutes, flouring the surface and your hands as needed.
Roll out to about 1/8 to 1/4 inch thickness. Cut into rectangles or circles, place on an ungreased cookie sheet, and bake 15 to 18 minutes, or until edges are beginning to brown lightly, and the cakes hold their shape. Remove to a cooling rack.
Serve with peanut butter, butter, jam, cheese, Nutella, or whatever you like!
Sunday, April 13, 2008
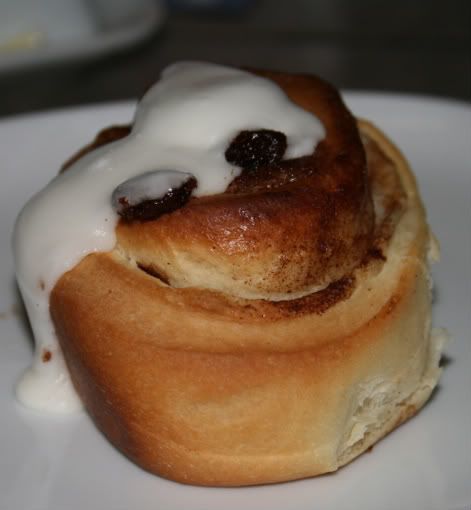
The Best Cinnamon Rolls in the World!
No, seriously.
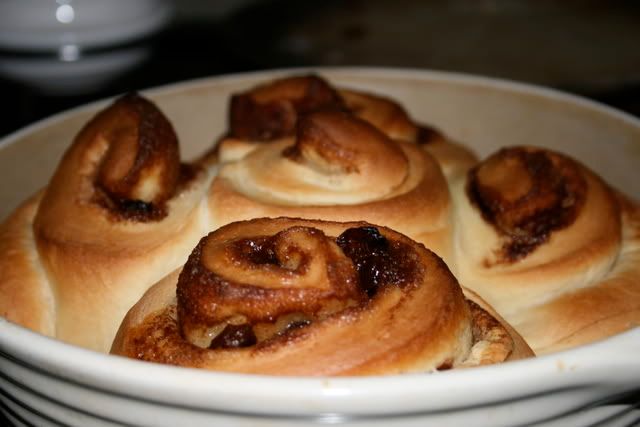
I made a variation of these cinnamon rolls from Joy the Baker this evening, and let me just say WOW. These were by far the best cinnamon rolls I've ever made, perhaps even the best I've ever had -- and that's saying a lot. The dough was beautiful. I mean, really, really, really gorgeous. It came together so easily, and rose like you wouldn't believe.
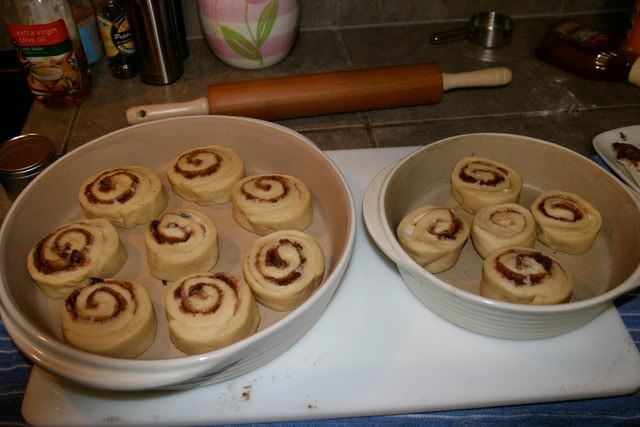
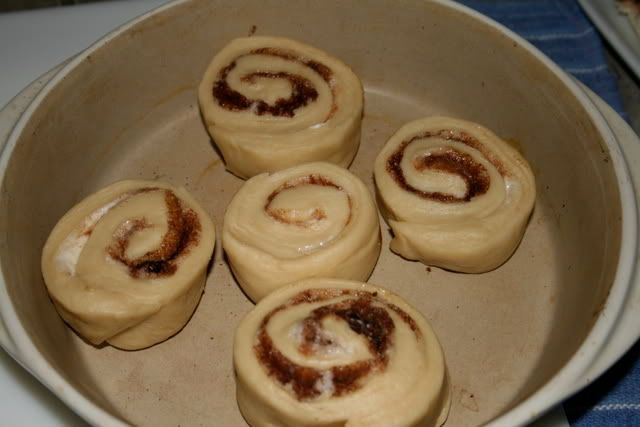
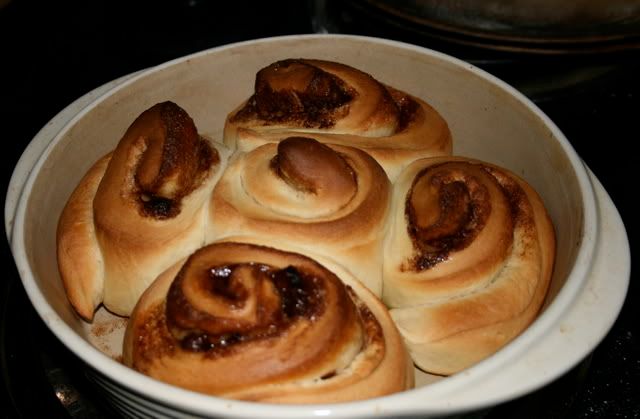
I made two pans, one large and one small. The large pan went into the fridge after the final rising, and will bake in the morning for breakfast. The small pan I baked tonight, and Brad and I had them for a late pseudo-dinner. They were delicious, and I can't wait to have more for breakfast in the morning.
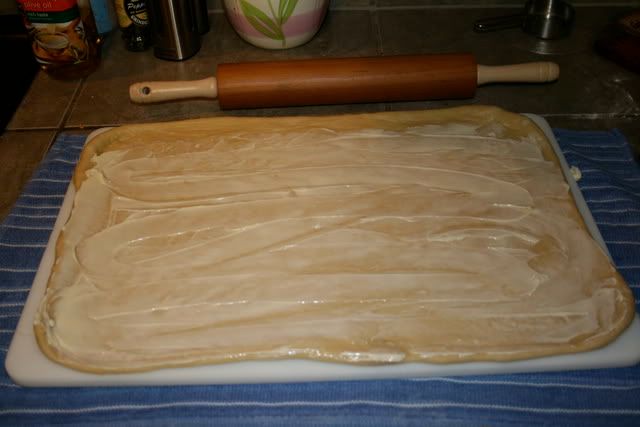
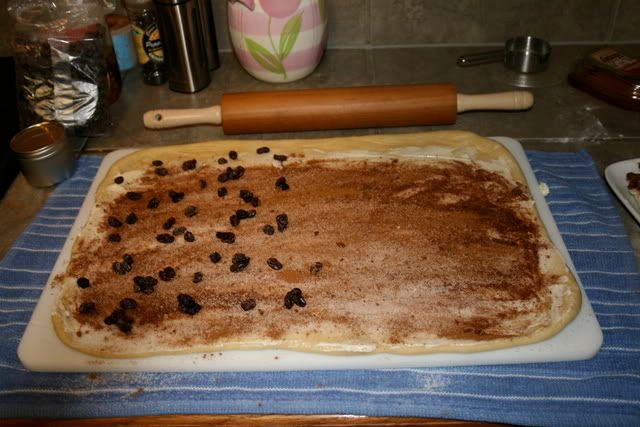
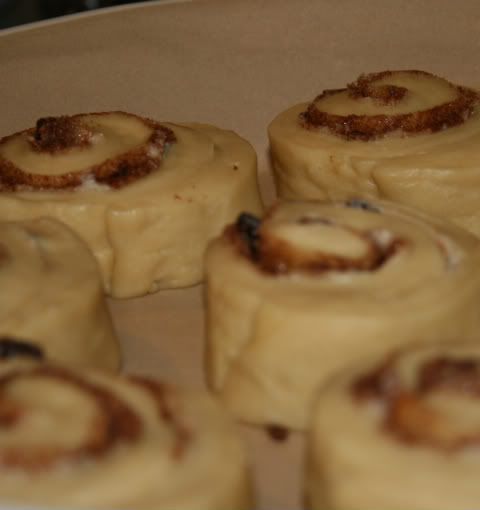
Before baking:
And after!
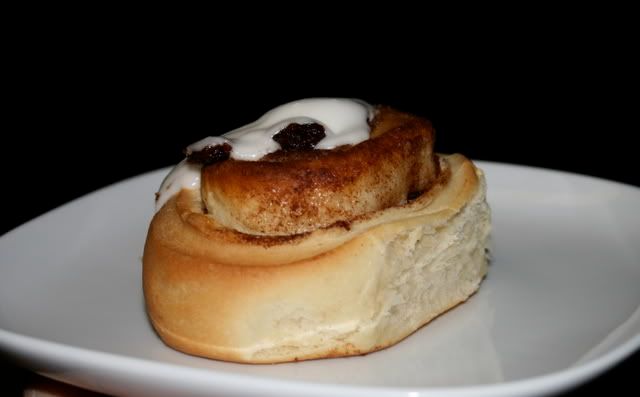
Here's the recipe I used, with my changes included. For the original recipe, be sure to check out Joy's recipe here. My changes were pretty simple. I left out the spices and lemon zest in the dough, and then when I rolled it out, I spread it with softened butter, and sprinkled it with cinnamon, sugar and raisins. For the glaze, I just used a simple butter/powdered sugar/milk glaze. Joy's rolls would obviously have a much more complex flavor than mine, with all those yummy spices and lemon zest. Either way, you can't go wrong! : )
Cinnamon Rolls
Sponge:
2 1/2 teaspoons instant yeast
1/2 cup bread flour
2/3 cup whole milk, cold
4 teaspoons honey
Final dough:
1 cup bread flour
1 1/2 cup all purpose flour
3/4 teaspoon salt
6 Tablespoons butter, cold
1/4 cup sugar
2 eggs, room temperature
Filling:
1/4 cup butter, softened
1/2 cup sugar
2 tsp cinnamon
Frosting:
1 1/2 cups powdered sugar
1 Tbsp butter, softened
1 to 2 Tbsp milk
Mix the sponge: In a medium bowl combine all of the dry ingredients followed lastly by the milk. Stir together for 2 minutes, then cover with the flours, then the salt from the final dough. The flours are used on top of the sponge like a covering of plastic wrap. Allow to ferment at room temperature for 20 minutes.
Begin the final dough: While the sponge is fermenting, in a 4-qt mixing bowl fitted with a paddle attachment, cream the butter of medium speed until smooth and pale. Add the sugar and continue creaming at the same speed for 5 minutes. It should be light and fluffy. Add the eggs in 4 additions, mix until combined. The mixture will look very wet, and curdled. This is a lot of eggs, for the amount of butter; it won’t be completely incorporated. Don’t worry!
Add the flour covered sponge to the butter mixture. Mix on low speed until evenly combined. On medium speed, continue to mix with the paddle attachment for 2 minutes. Switch to the dough hook and mix on low speed until smooth and satiny. If the dough is sticking a lot to the sides of the bowl, add all purpose flour 1 Tablespoon at a time. Stop the mixer occasionally to scrape the dough off the bottom of the bowl. Mixing with the dough hook takes about 5 minutes. You can finish with a minute or two of hand kneading if you like.
Place the dough in a lightly greased bowl. Place a clean dish towel over the bowl. Bulk ferment at room temperature for 1 1/2 hours.
Flip the dough out of the bowl onto a lightly floured surface to fold the dough and redistribute the yeast. With a floured hand, pat the dough roughly into a rectangle. Lift the left side of the dough and fold it over almost to the right side of the dough, leaving about 2 inches of room. Lift the right side and fold it all the way over to the left. Lift the bottom of the dough, the side closest to you, and fold it almost to the top of the dough, leaving about an inch. Lastly, fold the top of the dough all the way down towards you. Return the dough to the bowl and cover as before, leaving it for 30 minutes.
On a lightly floured work surface, using a rolling pin, degas and roll the dough out to a rectangle 15 inches high and 12 inches long.
Spread with the softened butter, and sprinkle evenly with the sugar, and then cinnamon. Add raisins, if desired. Beginning with the long edge, roll up the dough and cinnamon sugar filling. Brush the edge of the seam with water and pinch closed. Cover with a towel and let rest for 5 minutes. Meanwhile, preheat the oven to 375 degrees F.
Using a bench knife, or sharp kitchen knife, slice the dough into 1 inch cinnamon rolls. Place cinnamon rolls into a baking pan, leaving about 1 inch of space between. Cover the sliced cinnamon rolls with a towel and allow to rest and almost double in size, about 50 minutes. If the room is very warm from the oven, they will proof in as little as 35 minutes.
For the glaze, stir together butter, powdered sugar and milk with a fork; set aside.
Bake for 10-15 minutes, keeping an eye on them after 10 minutes, until they are a lovely golden brown. Remove from the oven and drizzle with glaze while still warm.

I made a variation of these cinnamon rolls from Joy the Baker this evening, and let me just say WOW. These were by far the best cinnamon rolls I've ever made, perhaps even the best I've ever had -- and that's saying a lot. The dough was beautiful. I mean, really, really, really gorgeous. It came together so easily, and rose like you wouldn't believe.

I made two pans, one large and one small. The large pan went into the fridge after the final rising, and will bake in the morning for breakfast. The small pan I baked tonight, and Brad and I had them for a late pseudo-dinner. They were delicious, and I can't wait to have more for breakfast in the morning.


Before baking:

And after!


Here's the recipe I used, with my changes included. For the original recipe, be sure to check out Joy's recipe here. My changes were pretty simple. I left out the spices and lemon zest in the dough, and then when I rolled it out, I spread it with softened butter, and sprinkled it with cinnamon, sugar and raisins. For the glaze, I just used a simple butter/powdered sugar/milk glaze. Joy's rolls would obviously have a much more complex flavor than mine, with all those yummy spices and lemon zest. Either way, you can't go wrong! : )
Cinnamon Rolls
Sponge:
2 1/2 teaspoons instant yeast
1/2 cup bread flour
2/3 cup whole milk, cold
4 teaspoons honey
Final dough:
1 cup bread flour
1 1/2 cup all purpose flour
3/4 teaspoon salt
6 Tablespoons butter, cold
1/4 cup sugar
2 eggs, room temperature
Filling:
1/4 cup butter, softened
1/2 cup sugar
2 tsp cinnamon
Frosting:
1 1/2 cups powdered sugar
1 Tbsp butter, softened
1 to 2 Tbsp milk
Mix the sponge: In a medium bowl combine all of the dry ingredients followed lastly by the milk. Stir together for 2 minutes, then cover with the flours, then the salt from the final dough. The flours are used on top of the sponge like a covering of plastic wrap. Allow to ferment at room temperature for 20 minutes.
Begin the final dough: While the sponge is fermenting, in a 4-qt mixing bowl fitted with a paddle attachment, cream the butter of medium speed until smooth and pale. Add the sugar and continue creaming at the same speed for 5 minutes. It should be light and fluffy. Add the eggs in 4 additions, mix until combined. The mixture will look very wet, and curdled. This is a lot of eggs, for the amount of butter; it won’t be completely incorporated. Don’t worry!
Add the flour covered sponge to the butter mixture. Mix on low speed until evenly combined. On medium speed, continue to mix with the paddle attachment for 2 minutes. Switch to the dough hook and mix on low speed until smooth and satiny. If the dough is sticking a lot to the sides of the bowl, add all purpose flour 1 Tablespoon at a time. Stop the mixer occasionally to scrape the dough off the bottom of the bowl. Mixing with the dough hook takes about 5 minutes. You can finish with a minute or two of hand kneading if you like.
Place the dough in a lightly greased bowl. Place a clean dish towel over the bowl. Bulk ferment at room temperature for 1 1/2 hours.
Flip the dough out of the bowl onto a lightly floured surface to fold the dough and redistribute the yeast. With a floured hand, pat the dough roughly into a rectangle. Lift the left side of the dough and fold it over almost to the right side of the dough, leaving about 2 inches of room. Lift the right side and fold it all the way over to the left. Lift the bottom of the dough, the side closest to you, and fold it almost to the top of the dough, leaving about an inch. Lastly, fold the top of the dough all the way down towards you. Return the dough to the bowl and cover as before, leaving it for 30 minutes.
On a lightly floured work surface, using a rolling pin, degas and roll the dough out to a rectangle 15 inches high and 12 inches long.
Spread with the softened butter, and sprinkle evenly with the sugar, and then cinnamon. Add raisins, if desired. Beginning with the long edge, roll up the dough and cinnamon sugar filling. Brush the edge of the seam with water and pinch closed. Cover with a towel and let rest for 5 minutes. Meanwhile, preheat the oven to 375 degrees F.
Using a bench knife, or sharp kitchen knife, slice the dough into 1 inch cinnamon rolls. Place cinnamon rolls into a baking pan, leaving about 1 inch of space between. Cover the sliced cinnamon rolls with a towel and allow to rest and almost double in size, about 50 minutes. If the room is very warm from the oven, they will proof in as little as 35 minutes.
For the glaze, stir together butter, powdered sugar and milk with a fork; set aside.
Bake for 10-15 minutes, keeping an eye on them after 10 minutes, until they are a lovely golden brown. Remove from the oven and drizzle with glaze while still warm.
Friday, April 11, 2008
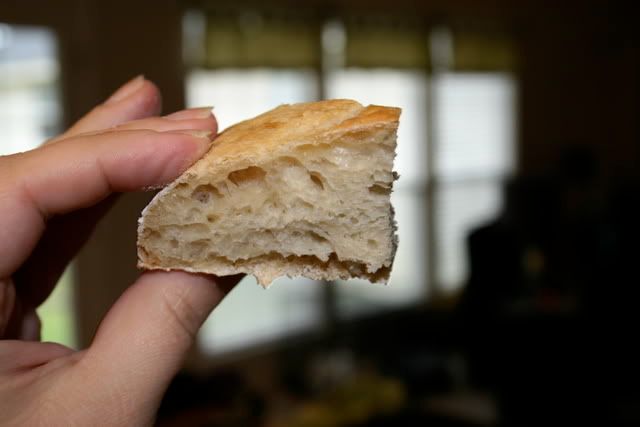
Super Quick, No-Knead Pizza Dough
This is a really quick and easy pizza dough recipe. I prefer the kind that is kneaded and rises once or twice, but this is still really good, and is quick to make if you're in a pinch. It isn't rolled or stretched, either, and is just patted into the pan with floured fingers. It doesn't get easier than that!
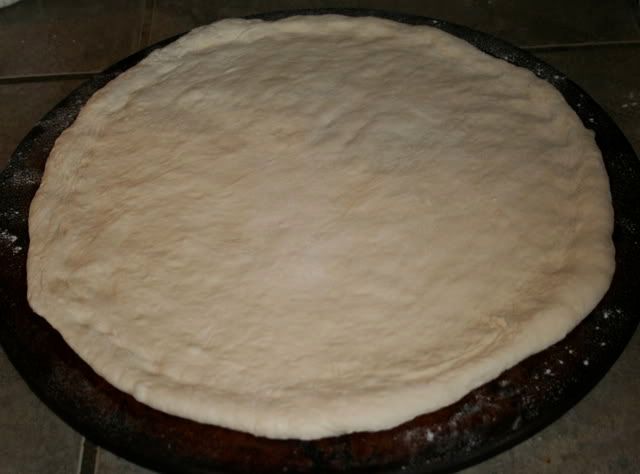
This is also good for breadsticks. Just pat the dough into a pan, spritz with olive oil, sprinkle with salt, and bake 10 to 12 minutes at 425. For pizza, top as desired, and bake 15 to 20 minutes at 425.
Super Quick, No-Knead Pizza Dough
1 pkg yeast
1 cup warm water
1 Tbsp olive oil
1 tsp sugar
1 tsp salt
2 1/2 cups flour
Dissolve yeast in water. Add remaining ingredients and stir vigorously 20 strokes. Let rest 5 minutes. With floured fingers, pat into pizza pan.
Saturday, March 29, 2008
Cornbread
This is a Southern style cornbread, made without flour. It's salty, not sweet, and is dense and gritty. If you're expecting a sweet, fluffy, cake-like cornbread, this isn't the recipe for you. But it's fabulous with soup, chili, red beans and rice, and so forth. I made it tonight to go with our leftover gumbo.
Cornbread
4 to 5 tablespoons bacon grease, shortening or vegetable oil
2 eggs
1 1/2 cups corn meal
1 teaspoon salt
1/2 teaspoon baking soda
1 1/4 cups buttermilk
Preheat oven to 400. Place bacon grease, shortening or oil in an 8-inch skillet. Let heat in the oven until it's almost smoking. Meanwhile, mix the batter.
Beat the eggs in a medium bowl until frothy. Add the corn meal, salt and baking soda, and stir to thoroughly combine. Add the buttermilk and stir well.
Remove the hot pan from the oven. Swirl the pan to make sure it is coated with oil.
Pour the batter into the pan, and bake 25 to 30 minutes.
Thursday, March 20, 2008
Hoagie Rolls
Ok, so I'm on a bit of a bread baking kick right now. I made these so we could have eggplant parmesan sandwiches with last night's leftovers. They were fabulous, and by far the best sandwich rolls I've made to date.
Hoagie Rolls
1 1/2 cup warm water
1 package yeast
1 tsp salt
2 tsp sugar
2 Tbsp olive oil
3 to 4 cups flour
Combine first 5 ingredients in a stand mixer, using the paddle attachment. Add flour, one cup at a time, while mixing on low. When dough forms a stiff ball, switch to the dough hook, and knead 10 minutes, adding flour as needed. Dough should be smooth and elastic, not sticky.
Grease a medium bowl with cooking spray. Shape dough into a ball and please in bowl, turning to coat. Cover with a dish towel and let rise 1 hour, or until doubled in bulk. Shape into rolls of desired shape. Torpedo-shaped hoagie rolls are standard, or you can roll the dough into a rectangle and slice into 6 squares, which are great for sandwiches. Cover and let rise 45 minutes. Slash tops of torpedo-shaped rolls with a sharp knife or scissors, but do not slash squares.
Preheat oven to 425. Bake rolls for 20 minutes, or until golden brown.
Wednesday, March 19, 2008
French Bread
This is an easy, go-to recipe for French Bread. It takes some time to make, but the active prep time is minimal.
French Bread
3 cups flour
1 package yeast
1 tsp salt
1 cup warm water
Combine 1 cup of the flour, and the remaining ingredients in a large stand mixer, using the paddle attachment. Mix for several minutes, until well blended. Add remaining flour and mix until it forms a stiff dough. Switch to the dough hook, and knead for 10 minutes, until dough is soft and elastic. Add flour as needed if the dough is too sticky.
Grease a large bowl, form dough into a ball, and place in the bowl, turning to coat. Cover and let rise in a warm place for 1 hour, or until doubled in bulk. I have mine rise in the oven with the light on.
Punch dough down, re-shape into a ball, then cover and let rise again for 30 to 40 minutes.
Roll/flatten dough out into a rectangle, then roll up into a long loaf, pinching seams to seal. Cover and let rise for 30 minutes.
Preheat oven to 375. Place dough on a baking sheet (I use stoneware). Brush dough lightly with water. Make 4 or 5 slashes in the top of the dough, using scissors or a sharp knife. Bake 35 to 40 minutes. I like to pull mine out of the oven after 20 minutes and quickly brush with more water.
Remove from baking sheet and let cool for at least 30 minutes before slicing and serving.
Sunday, March 16, 2008
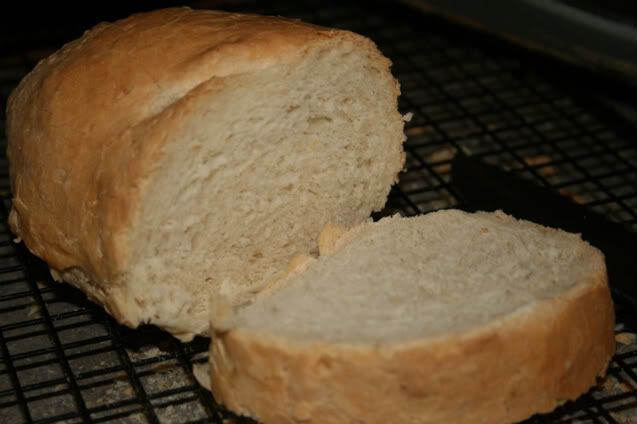
Shokupan (Japanese white sandwich bread)
Shortly after moving to Japan four years ago, Brad and I fell deeply in love with shokupan -- Japanese sandwich bread. It's soft and light, and makes the most incredible toast you've ever tasted. It all comes in the same size loaf (about the size of a bread machine loaf), as well as varying slice thickness (6 slices per loaf, 8 slices per loaf, and so forth). We tried not to buy it very often, as it's pretty high in fat, but I've been missing it lately, and decided to try baking my own.
I searched the internet high and low, trying to find a recipe. The problem is that they're all in Japanese, and the translations I've found are sketchy at best. I mixed up some dough this morning, using an ingredient list I found on several websites, but there must be something missing, because the dough was super sticky. Having had lots of experience making bread in the past, I just went with my gut and added flour until the texture seemed right. Hmmmm.
It rose until doubled, then I shaped it into loaves and let it rise again before baking. Upon further online research, I learned that Japanese bread is baked in a lidded loaf pan, which gives it its signature square shape, and gives a more even texture with fewer air bubbles. Unfortunately, I don't have the right kind of loaf pan, so I experimented with baking one loaf with a cookie sheet on top, to act as a lid of sorts, and the other loaf just in a standard loaf pan.

The bread is fantastic! I'm so excited! It's soft, light and uniform, and soooo delicious. The bread in the lidded pan was very close to the shokupan we used to buy, although my loaf pan is so short that we ended up with a very short loaf of bread. Each slice ended up being about as large as a half slice of standard bread, but hey, it still tastes great! I ordered a Pullman pan from eBay UK a few minutes ago, so once it arrives, I'll give this bread another go.
Tonight we had tuna sandwiches on the bread, and I swear we were in heaven. I think tomorrow morning we'll make french toast with it. Yummmmm.
Here's the recipe. I'm particularly pleased with myself because I used skim milk instead of the heavy cream that the recipe called for, and it was still great!
Shokupan
6 oz milk
1 package yeast
Just shy of 1 cup vital wheat gluten flour (I filled a measuring cup to about the 6 1/2 oz line)
Just shy of 1/2 cup all-purpose flour
1 Tbsp sugar
1/2 tsp salt
4 oz milk
2 Tbsp shortening, melted
additional flour
Heat milk until warm but not hot. Add yeast, stir to combine, and set aside for about 10 minutes.
Combine vital wheat gluten, all-purpose flour, sugar and salt in an electric mixer. Add milk and yeast mixture, beating until gluten strands develop. Add remaining milk and melted shortening. Add additional flour until a bread dough texture is reached. Change to a dough hook in the mixer, and knead for 10 minutes, adding a little flour as needed, until dough is soft and elastic, but not sticky. Shape into a ball, and place in a greased bowl, turning to coat. Cover with a dish towel and let rise in a warm place until doubled in bulk, about 1 hour. I place mine in the oven with the light on.
Punch down dough. Grease 2 loaf pans. Divide dough in half. Divide each half into thirds. Flatten into narrow rectangles, and roll tightly into balls. Place 3 rolls side by side in each loaf pan. Cover and let rise for 1 hour, until dough rises to the top of the pan.
Preheat oven to 400. Spritz tops of loaves with water. Bake 10 minutes at 400, then reduce temperature to 325 and bake an additional 10 to 20 minutes, until loaves are browned and sound hollow when tapped.
Let cool completely before slicing, or the loaves will go flat. It's hard to wait, but you'll be glad you did!
Subscribe to:
Posts (Atom)
